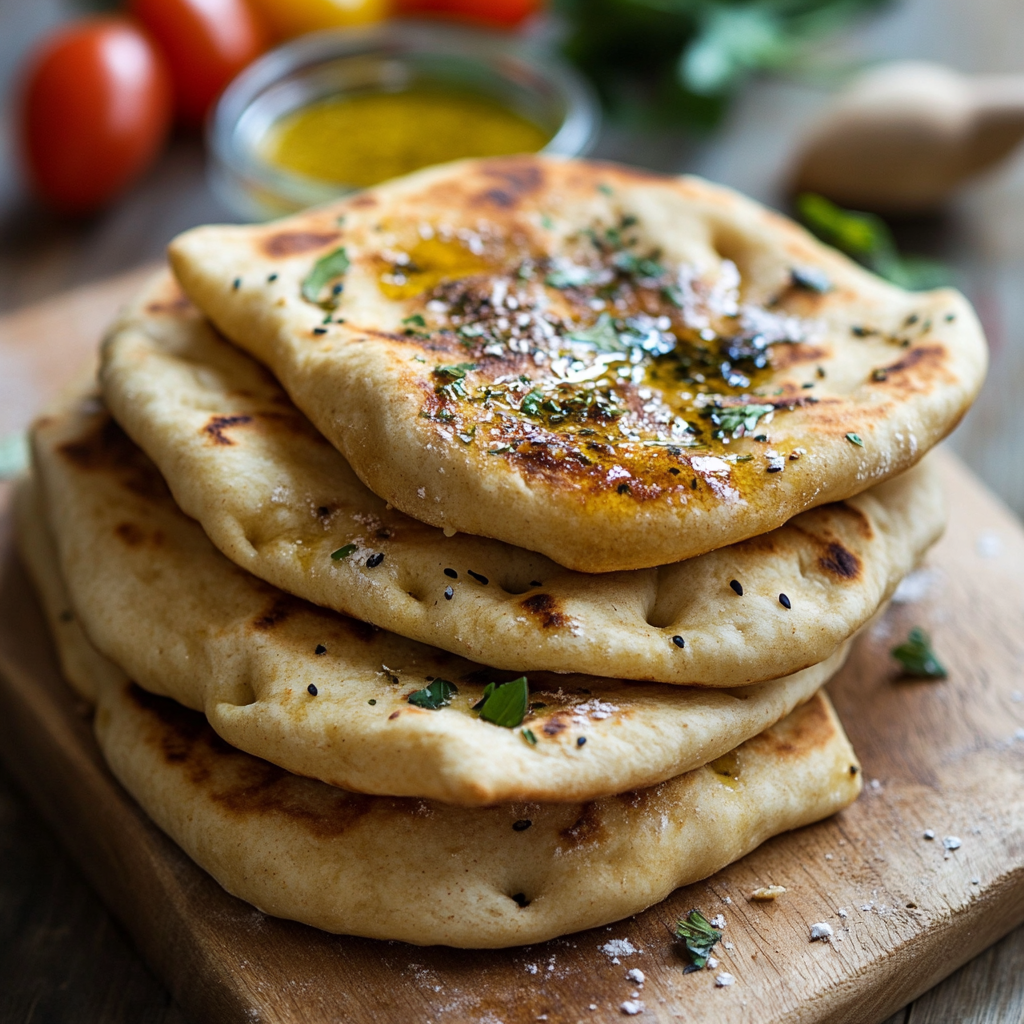
Hey there! Alexandre here from the warm, flour-dusted corner of my kitchen. Have you ever watched someone tear into a fresh pita bread and thought, “I wish I could make that at home”? Well, my friend, today’s your lucky day! Making homemade pita bread isn’t just possible—it’s surprisingly simple and utterly rewarding.
There’s something magical about watching that first pita puff up in the skillet, creating that perfect pocket just waiting to be stuffed with your favorite fillings. As a busy home cook who values both tradition and practicality, I’ve refined this recipe to be accessible for everyone—whether you’re a seasoned baker or someone who’s just starting their bread-making journey.
Why You’ll Love This Homemade Pita Bread
Let’s be honest: store-bought pita can be disappointing. Often dry, flavorless, and filled with preservatives, it’s a pale imitation of what this ancient bread is meant to be. When you make homemade pita bread, you’re not just creating food—you’re crafting an experience.
Unlike those mass-produced versions, your homemade pita will be soft, pillowy, and bursting with fresh-baked flavor. Plus, you’ll know exactly what’s in it: simple, wholesome ingredients you probably already have in your pantry. No weird additives or unpronounceable chemicals!
And can we talk about the versatility? From quick weekday lunches to impressive weekend dinner spreads, pita bread is the chameleon of the bread world. Stuff it, dip it, toast it, or tear it—pita bread plays well with practically everything in your refrigerator.
The Rich History of Pita Bread (In 30 Seconds!)
Before we dive into the mixing and kneading, let’s appreciate that this bread has thousands of years of history behind it! Originating in the Middle East, pita bread has been nourishing people across the Mediterranean, North Africa, and beyond for centuries.
What makes it special is that signature pocket—a culinary marvel that happens when the moisture in the dough turns to steam during cooking, causing the bread to puff dramatically. It’s like a little science experiment happening right on your stovetop!
Ingredients for Your Perfect Pita Bread
Here’s what you’ll need to gather before we start creating these pillowy pockets of goodness:
- 2½ cups all-purpose flour (plus extra for dusting)
- 1 teaspoon salt
- 1 teaspoon sugar
- 1 tablespoon active dry yeast
- 1 cup warm water (around 110°F/43°C)
- 2 tablespoons olive oil
Simple, right? These basic pantry staples transform into something extraordinary with just a little time and patience. I always recommend measuring your ingredients by weight if you have a kitchen scale—it makes for more consistent results. But don’t worry if you don’t have one! Cup measurements work perfectly fine too.
Equipment You’ll Need
Nothing fancy required here! Just:
- A large mixing bowl
- Measuring cups and spoons
- A wooden spoon or spatula
- A clean surface for kneading
- A rolling pin
- A large skillet or griddle
- A clean kitchen towel
Step-by-Step Pita Bread Instructions
1. Wake Up Your Yeast
First things first—let’s make sure our yeast is alive and ready to work its magic! In a small bowl, combine the warm water (it should feel like comfortable bath water), sugar, and yeast. Give it a gentle stir and let it sit for about 5-10 minutes.
Pro tip: Watch for bubbles and foam on the surface—that’s how you know your yeast is active and ready to go! If nothing happens after 10 minutes, your yeast might be old or your water might be too hot or cold. Time to start fresh!
2. Create Your Dough Base
While your yeast is activating, whisk the flour and salt together in a large bowl. This evenly distributes the salt, which is important since salt can inhibit yeast activity if they come into direct contact.
Once your yeast mixture is foamy and fragrant, create a well in the center of your flour mixture. Pour in the activated yeast mixture and the olive oil. Using a wooden spoon or your hands (I prefer hands—you get a better feel for the dough), stir until everything comes together into a shaggy, rough dough.
3. Knead Your Way to Pita Perfection
Turn the dough out onto a lightly floured surface and roll up your sleeves—it’s kneading time! Push the dough away from you with the heel of your hand, then fold it back toward you. Give it a quarter turn and repeat. Keep this rhythm going for about 5-7 minutes.
What are we looking for? The dough should become smooth and elastic. When you press it with your finger, it should slowly spring back. It should feel slightly tacky but not sticky—like touching your earlobe (strange but true comparison!).
If your dough feels too dry, add a teaspoon of warm water. Too sticky? Sprinkle in a bit more flour, but go easy—too much flour will make your pitas dense.
4. The First Rise: Patience Pays Off
Place your beautifully kneaded dough in a lightly oiled bowl, turning it once to coat all sides. Cover the bowl with a damp kitchen towel or plastic wrap and find it a warm, draft-free spot to rest. We’re looking for the dough to double in size, which usually takes about 1-1½ hours.
My secret spot: I like to turn my oven on to the lowest setting for just 1-2 minutes, then turn it off and place the dough inside with the door closed. It creates the perfect warm environment for rising!
5. Shape Your Pitas
Once the dough has doubled (you can tell it’s ready when you poke it with your finger and the indentation remains), it’s time to shape! Gently punch down the dough to release any air bubbles, then divide it into 6-8 equal portions, depending on how large you want your pitas.
Roll each portion into a smooth ball, then use a rolling pin to flatten into circles about ¼ inch thick. Try to keep them even—this helps with that perfect puff we’re looking for.
The waiting game: After shaping, let the pitas rest for about 10 minutes. This relaxes the gluten and makes for a better puff during cooking.
6. The Exciting Part: Cooking Your Pitas
Now for the magic! Heat a large skillet or griddle over medium-high heat. You want it hot—but not smoking hot.
Cook each pita for about 1-2 minutes on the first side. When bubbles form and the bottom takes on a light golden color, it’s time to flip! Cook for another 1-2 minutes on the second side, and watch in wonder as your pita puffs up like a balloon! It’s honestly one of the most satisfying moments in bread-making.
If your pitas aren’t puffing, don’t panic! Press gently on the surface with a spatula—sometimes they need a little encouragement. You can also try increasing the heat slightly.
7. Keep Them Warm and Soft
As each pita finishes cooking, stack them on a plate and cover with a clean kitchen towel. The residual heat and steam will keep them soft and pliable until serving time.
Storage Tips for Your Homemade Pita Bread
Freshly made pita bread is best enjoyed, well, fresh! But if you have leftovers, let them cool completely, then store in an airtight container or zip-top bag at room temperature for up to 2 days.
For longer storage, freeze them! Place parchment paper between each pita to prevent sticking, then seal in a freezer bag. They’ll keep for up to 3 months. When you’re ready to enjoy, thaw at room temperature and give them a quick warm-up in a skillet or toaster for that fresh-baked taste.
My Favorite Pita Bread Tricks and Tips
After years of pita-making trials (and yes, a few entertaining failures), I’ve collected some golden nuggets of wisdom to share with you. These tips will take your homemade pita bread from “pretty good” to “where has this been all my life?”
Get That Perfect Pocket Every Time
The elusive pocket—that magical hollow space that makes pita bread so special—can sometimes be tricky to achieve. Here’s my foolproof method: make sure your skillet is properly hot before adding the pita. A drop of water should sizzle and dance when it hits the surface. Too cool, and your pita will just be flat (still delicious, but missing that signature pocket).
If you’re still having trouble, try rolling your pitas slightly thinner (about ⅛ inch instead of ¼ inch). Sometimes a thinner dough puffs more dramatically. And don’t forget to let the shaped dough rest before cooking—those 10 minutes of relaxation make all the difference!
The Secret Ingredient: Steam
Steam is the unsung hero of pita bread! To encourage maximum puffing, I sometimes cover the skillet with a lid for about 30 seconds after flipping the pita. The trapped steam helps inflate the bread beautifully. Just be careful when removing the lid—that burst of steam is hot!
When Things Go Flat
Did your pita bread refuse to puff? No worries! First, don’t be too hard on yourself—even experienced bakers have flat days. Second, those unpuffed pitas are still delicious and versatile! Cut them into triangles, brush with olive oil, sprinkle with za’atar or garlic salt, and bake until crisp for amazing pita chips. Problem solved and snack time upgraded!
Whole Wheat Variations
Want to make your pita bread more nutritious? Try substituting up to half of the all-purpose flour with whole wheat flour. This adds a lovely nutty flavor and more fiber. Just note that whole wheat pitas might not puff quite as dramatically, and you might need to add a bit more water since whole wheat flour absorbs more moisture.
Flavor Boosters: Taking Your Pita to the Next Level
Plain pita bread is wonderful, but sometimes it’s fun to play with flavors. Here are some of my favorite add-ins:
- Herb-infused: Add 2 tablespoons of fresh chopped herbs like parsley, dill, or mint to the dough for a fragrant twist.
- Garlic lover’s dream: Mix in 2 teaspoons of garlic powder or 2 cloves of finely minced garlic.
- Spice it up: A teaspoon of cumin, paprika, or za’atar can transport your taste buds straight to the Mediterranean.
- Sweet option: Add an extra teaspoon of sugar and a dash of cinnamon for a subtly sweet pita that pairs beautifully with honey or jam.
Just be sure to knead any add-ins thoroughly to distribute them evenly throughout the dough.
The “Alexandre Story”: Pita Bread Saved Dinner
Let me share a little secret: pita bread has rescued me from more than one dinner disaster! One Friday evening, I had promised my family a special dinner but completely forgot to pick up bread for the meal. With guests arriving in an hour and no time to run to the store, I frantically searched my pantry and realized I had everything needed for pita bread.
While my main dish simmered, I quickly mixed up pita dough and let it rise. By the time our friends arrived, I was pulling freshly made pitas off the skillet, filling the house with that irresistible baked bread aroma. Not only did everyone rave about the “planned” homemade bread, but our guests insisted I teach them how to make it too!
Now it’s become my signature move—whenever someone visits, they know they’ll be tearing into warm, fluffy pita bread at some point during the meal. Sometimes, the best traditions are born from near-disasters!
Serving Ideas: Beyond the Basic Pocket
While stuffing pita bread with your favorite fillings is always a winner, there are so many other ways to enjoy this versatile bread:
Breakfast Pita: Toast a pita lightly, then top with smashed avocado, a fried egg, and a sprinkle of everything bagel seasoning. Weekend brunch, sorted!
Pita Pizzas: These are a weeknight lifesaver in my house. Spread pitas with tomato sauce, sprinkle with cheese and your favorite toppings, then broil until bubbly. Dinner in under 10 minutes!
Pita Croutons: Cut stale pitas into squares, toss with olive oil and herbs, then bake until crispy. These add amazing crunch to salads and soups.
Dessert Pita: Brush pita with melted butter, sprinkle with cinnamon sugar, and toast until golden. Serve with a scoop of ice cream or fresh fruit for an easy dessert.
Frequently Asked Questions
Can I make pita bread without yeast?
While traditional pita bread uses yeast for that distinctive texture and flavor, you can make a simplified version with baking powder. Mix 2½ cups of flour with 2 teaspoons of baking powder, 1 teaspoon of salt, 2 tablespoons of olive oil, and about 1 cup of warm water. The texture won’t be exactly the same, but in a pinch, this quick version works for impromptu meals. That said, the yeast version is definitely worth the extra rising time when you can spare it!
Why didn’t my pita bread puff up in the oven?
If you’re baking your pita bread in the oven rather than on the stovetop, make sure your oven is properly preheated to at least 450°F (230°C) and that you’re using a preheated baking stone or inverted baking sheet. The sudden blast of high heat is crucial for creating steam inside the dough. Also, make sure your dough isn’t too thick—aim for about ¼ inch thickness for the best puff. Sometimes, lightly misting the dough with water just before baking can help create extra steam.
How can I keep my pita bread soft after cooking?
The key to keeping pita bread soft is proper storage! As soon as your pitas come off the heat, stack them and wrap them in a clean kitchen towel. The residual heat and steam will keep them soft and pliable. Once completely cooled, store them in an airtight container or zip-top bag with a paper towel inside to absorb any excess moisture. If your pitas do firm up, simply sprinkle them lightly with water and warm them briefly in a skillet or microwave to restore their softness.
Let’s Wrap This Up (Pun Intended!)
Making homemade pita bread is one of those kitchen skills that feels like a superpower once you’ve mastered it. It transforms simple ingredients into something that brings people together around the table, creates opportunities for sharing and conversation, and connects us to culinary traditions that span cultures and centuries.
Whether you’re stuffing it with falafel for a traditional meal, using it to scoop up hummus at a party, or sending your kids to school with pita pocket sandwiches, this versatile bread is sure to become a staple in your kitchen. The process itself—the mixing, kneading, shaping, and that magical moment of puffing—becomes a rhythm that feels almost meditative with practice.
I hope this homemade pita bread recipe brings as much joy to your kitchen as it has to mine. Remember, even if your first batch isn’t perfect, each pita you make teaches you something. Soon, you’ll be turning out professional-quality pita bread with the confidence of someone who’s been baking for generations!
More Bread Adventures Await!
If you’ve enjoyed making homemade pita bread, you might also love these other bread recipes from my kitchen:
- Crusty No-Knead Bread that practically makes itself overnight
- Soft Dinner Rolls that will make you forget about store-bought versions forever
- Easy Focaccia with endless topping possibilities
For more information about the science behind bread baking, check out The Bread Baker’s Apprentice by Peter Reinhart, or visit King Arthur Baking Company for their excellent yeast baking guide.
So, flour up those hands, channel your inner bread baker, and get ready to experience the pure joy of homemade pita bread. Your taste buds—and anyone lucky enough to share your table—will thank you!


