Oh friend, let me tell you about my absolute favorite comfort dessert to make when I need something that feels like a warm hug in a bowl: Homemade Banana Pudding. There’s just something magical about those layers of creamy vanilla custard, soft bananas, and those nostalgic vanilla wafers that makes everything feel right with the world.
As I write this, I can almost smell the sweet vanilla aroma filling my kitchen. Whether you’re making this for a Sunday family dinner, bringing it to a potluck, or just treating yourself after a long week (you deserve it!), this homemade banana pudding recipe is guaranteed to bring smiles all around.
Why You’ll Love This Homemade Banana Pudding
First things first – this isn’t your instant pudding mix with a few bananas thrown in (not that there’s anything wrong with that in a pinch!). This is the real deal: a made-from-scratch custard that’s rich, silky, and absolutely worth the little bit of extra time.
What makes this homemade banana pudding special is the perfect balance of textures and flavors. The velvety custard, made with a combination of milk, cream, and egg yolks, creates the dreamiest base. The bananas add natural sweetness and a fresh bite, while the vanilla wafers provide that delightful contrast between soft and just slightly crunchy.
And here’s the best part – it actually tastes BETTER the next day, making it the perfect make-ahead dessert for those busy times when you need a showstopper but don’t want to be scrambling at the last minute.
A Dessert With Southern Roots
Homemade banana pudding has a special place in Southern cuisine, where it’s considered an essential comfort food. Dating back to the late 19th century, this humble dessert has graced countless family tables, church potlucks, and holiday gatherings.
What I love about banana pudding is how it bridges generations. I’ve watched my grandmother make it, then my mother, and now it’s my turn to carry on the tradition. Each time I make it, I’m connecting with those memories while creating new ones with my own family.
Ingredients You’ll Need
Let’s gather everything you’ll need for this homemade banana pudding. I’ll walk you through each ingredient and why it matters:
- 4 ripe bananas: Look for bananas with a few brown spots – they’re sweeter and more flavorful. Not too green (they’ll be starchy) and not too brown (they’ll turn mushy).
- 1 1/2 cups whole milk: Whole milk gives us that rich creaminess. If you’re dairy-free, almond or oat milk can work too!
- 1 cup heavy cream: This takes our custard from good to magnificent. It adds that luxurious mouthfeel that makes homemade banana pudding so special.
- 3/4 cup granulated sugar: Just enough sweetness without overwhelming the natural flavor of the bananas.
- 1/4 cup cornstarch: Our thickening agent that gives the custard its perfect consistency.
- 1/4 teaspoon salt: Don’t skip this! Salt enhances sweetness and balances flavors.
- 4 large egg yolks: These add richness and help thicken our custard. Save those whites for meringue cookies or an egg white omelet!
- 1 teaspoon vanilla extract: The aromatic heart of our pudding. Pure vanilla extract is worth the splurge here.
- 1 box vanilla wafer cookies: The classic choice! They soften just enough while still maintaining some structure.
- Whipped cream for topping (optional): A cloud of freshly whipped cream takes this dessert over the top.
Step-by-Step Instructions
Step 1: Prepare the Custard Base
In a medium saucepan, whisk together the milk, heavy cream, sugar, cornstarch, and salt until well combined. This is where the magic begins!
Place the saucepan over medium heat and start stirring. This is not the time to multitask, friends – you’ll want to stir constantly to prevent those pesky lumps from forming. Trust me, I’ve learned this lesson the hard way!
The mixture will gradually begin to thicken as it heats up. You’ll notice it changing from thin and milky to something more substantial that coats the back of your spoon. This usually takes about 5-7 minutes.
Once it reaches a pudding-like consistency, remove it from the heat. Take a moment to appreciate how far you’ve come – you’re making homemade custard from scratch!
Step 2: Temper the Egg Yolks
Now for a technique that might sound fancy but is actually quite simple: tempering eggs.
In a separate bowl, whisk those beautiful golden egg yolks until they’re smooth. Then, very gradually, add a small amount of the hot milk mixture to the yolks while whisking constantly.
This gentle introduction of heat prevents the eggs from scrambling (nobody wants scrambled egg custard!). Once you’ve added about a cup of the hot milk mixture to the eggs, slowly pour the egg mixture back into the saucepan, continuing to whisk the whole time.
It’s like introducing two friends who might not get along right away – you’ve got to do it carefully and with plenty of supervision!
Step 3: Cook the Custard to Perfection
Return your saucepan to medium heat and cook for another 2-3 minutes, stirring constantly. You’ll know your custard is ready when it thickens further and beautifully coats the back of a spoon.
Remove from heat and stir in the vanilla extract. That heavenly aroma? That’s the smell of comfort right there.
Let the custard cool for about 10-15 minutes, giving it an occasional stir to prevent a skin from forming on top. If you’re in a rush, you can place the custard in a shallow bowl and cover with plastic wrap directly on the surface to cool it faster.
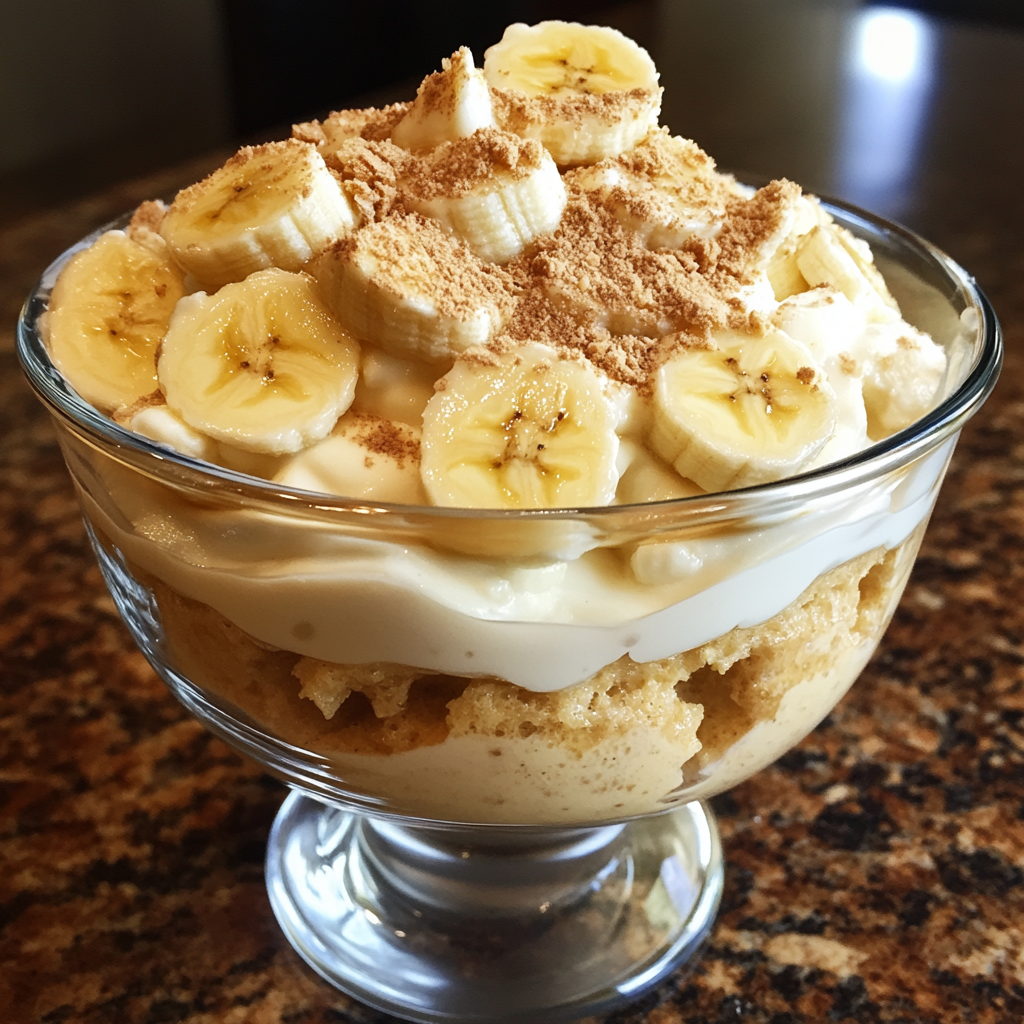
Step 4: Assemble the Pudding Layers
This is where it gets fun – the assembly! Slice your bananas into rounds about 1/4-inch thick.
In a trifle dish or any pretty glass bowl (so everyone can see those beautiful layers!), start building your masterpiece:
- A layer of vanilla wafers on the bottom
- A layer of banana slices
- A generous layer of that luscious custard you just made
Repeat these layers until you’ve used all your ingredients, making sure to finish with a layer of custard on top. This is your canvas – make it beautiful!
Step 5: Chill and Serve
Cover your creation with plastic wrap and refrigerate for at least 2 hours, though overnight is even better. This resting time is crucial – it allows the flavors to meld and the wafers to soften just enough to achieve that perfect texture.
When you’re ready to serve, top with a dollop of whipped cream and maybe a few extra banana slices or crushed wafers for that Instagram-worthy presentation.
Serving Your Homemade Banana Pudding
This dessert is versatile enough to grace any table. Serve it in a beautiful trifle dish for a holiday gathering, or portion it into individual mason jars for a picnic or casual get-together. It’s equally at home at a backyard barbecue as it is at a fancy dinner party.
And here’s a little secret: while it’s delicious cold straight from the refrigerator, letting it sit at room temperature for about 15 minutes before serving allows the flavors to bloom even more.
Cooking Tips for Banana Pudding Success
Let me share some of my favorite tips for making this homemade banana pudding absolutely foolproof:
For Perfect Custard: Remember that patience is key when making custard. Keep the heat at medium – too high and you risk scorching, too low and you’ll be stirring until next Tuesday! And don’t panic if you see a few small lumps forming. Just grab a fine-mesh strainer and pour your custard through it for silky-smooth results. Problem solved without the drama!
Banana Selection: Timing is everything with bananas. Too green and they’ll be starchy and flavorless; too ripe and your pudding might turn into banana soup by tomorrow! I look for bananas that are yellow with just a few brown spots – what I call the “perfect pudding ripeness.” And here’s a trick: if your bananas aren’t quite ready, place them in a paper bag with an apple overnight to speed up ripening.
Vanilla Wafer Wisdom: While the classic store-bought vanilla wafers work beautifully, sometimes I make my own when I’m feeling fancy (or when my kids have mysteriously emptied the cookie box). But here’s my confession: I always set aside a few extra cookies for “quality control tasting” – it’s the chef’s privilege, right?
Make-Ahead Magic: This dessert actually improves with time as the flavors meld and the cookies soften to that perfect texture. I often make it the night before, which not only tastes better but saves me from day-of kitchen stress. Just hold off on any whipped cream topping until right before serving.
My Banana Pudding Story
I’ll never forget the first time I made this homemade banana pudding for my family. It was for my daughter’s birthday, and I had grand plans of creating this picture-perfect dessert that would have everyone oohing and aahing.
Well, friends, let’s just say it didn’t quite go as planned! I got distracted by birthday preparations and left my custard unattended for just a minute – which in custard-making time is basically an eternity. I returned to find it had thickened into something closer to vanilla concrete than silky pudding!
After a moment of panic (and maybe a few words not suitable for the birthday party), I added a splash of milk, gave it a good whisking, and somehow managed to salvage it. And you know what? Despite my custard crisis, it was the hit of the party. My daughter now requests “Mom’s special lumpy banana pudding” every year, proving that even our kitchen mishaps can become beloved traditions.
That’s what I love about cooking – sometimes the imperfect dishes come with the best stories and become the most requested repeats.
Common Questions About Homemade Banana Pudding
Can I make this banana pudding ahead of time?
Absolutely! In fact, I recommend making this homemade banana pudding a day in advance. The overnight rest in the refrigerator allows the vanilla wafers to soften perfectly and the flavors to marry beautifully. Just save any whipped cream topping for right before serving for the freshest presentation. This make-ahead dessert is perfect for busy hosts who want to impress without the last-minute fuss.
How long will homemade banana pudding keep in the refrigerator?
Your banana pudding will stay delicious for up to 3 days in the refrigerator when stored in an airtight container. After that, the bananas may start to darken and the texture might change. That said, in my house, leftovers rarely last beyond 24 hours! If you’re making it for a smaller group, consider assembling individual portions in small jars so you can enjoy this southern dessert throughout the week.
Can I make this banana pudding recipe dairy-free?
Yes! To create a dairy-free version of this comfort dessert, substitute the whole milk with almond milk, oat milk, or your favorite plant-based milk. Replace the heavy cream with full-fat coconut milk (the kind in a can) for that creamy richness. There are also several dairy-free vanilla wafer options available at most grocery stores. The custard might set up slightly differently, but the flavor will still be delicious with these simple swaps.
Creative Variations to Try
While the classic homemade banana pudding is perfect as is, sometimes it’s fun to mix things up:
Chocolate Lover’s Banana Pudding: Add 1/4 cup of cocoa powder to your custard mixture and use chocolate wafer cookies instead of vanilla. The chocolate-banana combination is absolutely divine.
Caramel Banana Pudding: Drizzle layers of caramel sauce between the custard, bananas, and cookies for a decadent twist. Top with a sprinkle of flaky sea salt to balance the sweetness.
Tropical Banana Pudding: Add a layer of diced pineapple and use coconut cookies instead of vanilla wafers. A sprinkle of toasted coconut on top completes the tropical transformation.
Mini Mason Jar Puddings: For gatherings, assemble individual portions in small mason jars. They not only look adorable but also solve the serving dilemma – no more worrying about that first messy scoop!
Making Memories Around the Table
There’s something about homemade banana pudding that goes beyond just being a delicious dessert. Perhaps it’s the nostalgia factor, or maybe it’s how it tends to appear at gatherings where people are creating memories. I’ve brought this pudding to family reunions, neighborhood potlucks, and holiday celebrations, and it always seems to spark conversations and stories.
“This reminds me of my grandmother’s recipe!” someone will inevitably say, and suddenly the table is filled with shared memories and connections. Food has this beautiful way of bringing people together, and few desserts do it better than a homemade banana pudding made with love and care.
So the next time you’re looking for a dessert that offers both comfort and a touch of celebration, I hope you’ll try this homemade banana pudding recipe. It’s more than just ingredients in a bowl – it’s a little bit of magic that turns ordinary moments into special ones.
Perfect Pairings
While this banana pudding stands perfectly well on its own, pairing it with the right beverage can elevate your dessert experience even further:
- A cup of hot coffee creates a delightful temperature and flavor contrast
- Cold milk is a classic choice that brings out the vanilla notes
- For adults, a small glass of bourbon or a dessert wine can create an elegant after-dinner experience
Conclusion: Why This Homemade Banana Pudding Will Become Your Go-To
Whether you’re a seasoned baker or just starting your kitchen adventures, this homemade banana pudding recipe is one to add to your collection. It strikes that perfect balance between impressive and approachable – special enough for celebrations but simple enough for just-because dessert nights.
The beauty of this banana pudding is in its layers – not just the physical layers of custard, fruit, and cookies, but the layers of flavor, texture, and even meaning. It’s a dessert that connects us to traditions while allowing plenty of room for making it our own.
So roll up your sleeves, gather your ingredients, and prepare to create a dessert that’s more than just food – it’s a memory in the making. And isn’t that what the best recipes are all about?
Looking for More Comforting Desserts?
If you enjoyed this homemade banana pudding, you might also love these other desserts from our collection:
- Classic Apple Crisp with Oat Topping – Another comforting classic that’s perfect for fall gatherings
- Chocolate Bread Pudding – A rich, chocolatey twist on traditional bread pudding
- Southern Peach Cobbler – The perfect companion to this banana pudding for a true Southern dessert spread
For more information about the history of traditional Southern desserts, check out this fascinating article from Southern Living.
If you want to learn more about the art of custard-making, America’s Test Kitchen has an excellent guide that covers all the basics and advanced techniques.


