There’s something magical about biting into a perfectly crafted classic burger. That first moment when your teeth sink through the soft toasted bun, hit the crisp lettuce, and finally reach the juicy patty – it’s pure bliss! Hi there, it’s Alexandre from foodytasty.com, and today I’m sharing my go-to classic burger recipe that has saved countless weeknight dinners at my house.
As a busy parent myself, I know how challenging it can be to put a meal on the table that everyone actually wants to eat. Between soccer practice, homework battles, and that mountain of laundry that never seems to disappear, dinner can feel like just another hurdle in your day. That’s exactly why this classic burger recipe deserves a special place in your cooking arsenal.
Why You’ll Love This Classic Burger
What makes a classic burger so incredibly appealing? It’s that perfect balance of flavors and textures that satisfies on a primal level. The savory, juicy patty paired with crisp vegetables and creamy condiments creates a harmony that’s hard to beat. Plus, everyone can customize their burger exactly how they like it – a win for households with picky eaters!
This classic burger recipe is:
- Ready in under 30 minutes (perfect for those “I forgot about dinner” evenings)
- Made with simple ingredients you likely already have
- Endlessly customizable for everyone at your table
- A guaranteed crowd-pleaser that works for both casual weeknights and weekend gatherings
- Perfect for meal prep – make extra patties and freeze them for later!
When life gets hectic, there’s comfort in returning to the classics. A well-made burger connects us to simpler times, bringing everyone to the table with smiles instead of complaints. Now that’s what I call kitchen magic!
A Brief Taste of Burger History
Before we dive into the recipe, let’s take a quick journey through burger history. While we often think of burgers as quintessentially American, their story begins elsewhere. Some historians trace the concept back to the Mongol Empire, where horsemen would tenderize meat under their saddles (talk about a rough ride for dinner!).
The more direct ancestor of our modern burger likely came from Hamburg, Germany, where sailors brought seasoned beef patties to American shores in the 19th century. By the early 1900s, the burger had found its footing in American diners and drive-ins, evolving into the beloved staple we know today.
What I find fascinating about the humble burger is how it has transcended borders, becoming a global phenomenon with countless variations. From spicy masala burgers in India to teriyaki-infused versions in Japan, the burger has proven itself to be one of the most adaptable foods on the planet.
Essential Ingredients for the Perfect Classic Burger
The beauty of a classic burger lies in its simplicity. You don’t need fancy ingredients or complicated techniques to create something truly spectacular. Here’s what you’ll need:
For the Patties (makes 4):
- 1 pound (450g) ground beef (80:20 lean-to-fat ratio for optimal juiciness)
- 1/2 teaspoon fine sea salt
- 1/4 teaspoon freshly ground black pepper
- 1/2 teaspoon garlic powder (optional but recommended)
- 1/2 teaspoon smoked paprika (optional for a subtle smoky flavor)
For Assembly:
- 4 fresh burger buns (brioche, sesame, or whole wheat)
- 4 slices of melting cheese (cheddar, Swiss, or mozzarella)
- 1 small onion, thinly sliced into rings
- 1 ripe tomato, sliced into even rounds
- 4-8 crisp lettuce leaves
- 4-8 dill pickle slices
- Your favorite condiments (ketchup, mustard, mayo)
How to Make the Perfect Classic Burger
Step 1: Prepare Those Juicy Patties
The foundation of any great burger is the patty. Here’s how to get it just right:
- In a large mixing bowl, gently combine the ground meat with salt, pepper, garlic powder, and smoked paprika (if using). The key word here is gently – overworking the meat will result in tough patties, and nobody wants that!
- Divide the mixture into 4 equal portions. Shape each portion into a round patty about 3/4-inch thick. Here’s a pro tip: use your thumb to make a small indent in the center of each patty. This simple trick prevents the patty from puffing up during cooking, ensuring an even burger that fits perfectly on your bun.
- Place the patties on a plate, cover with plastic wrap, and let them rest in the refrigerator for 15-20 minutes. This chilling time helps the patties hold their shape while cooking and allows the flavors to meld together.
Quick Tip: For extra juicy patties, add a splash of Worcestershire sauce or a tablespoon of finely grated onion to the meat mixture before shaping.
Step 2: Cook Those Patties to Perfection
Now comes the exciting part – cooking your homemade burger patties to juicy perfection:
- Heat a skillet, grill pan, or outdoor grill over medium-high heat. Add a light brush of oil to prevent sticking.
- Once hot, place your patties on the cooking surface, making sure not to overcrowd them. Cook for 3-4 minutes on the first side until a beautiful golden-brown crust forms.
- Flip the patties with a spatula and cook for:
- 3 minutes for medium-rare
- 4-5 minutes for medium-well
- 6 minutes for well-done
- During the last minute of cooking, place a slice of cheese on each patty. If using a pan, cover it briefly to help the cheese melt into gooey perfection.
Quick Tip: For an extra rich flavor, add a small pat of butter on top of each patty while cooking. It’s a restaurant secret that makes a world of difference!
Step 3: Toast Those Buns
While your patties are cooking, don’t forget about the buns! A toasted bun makes all the difference between a good burger and a great one:
- Slice your burger buns in half horizontally.
- Lightly toast the cut sides on the grill, in a separate skillet, or under the broiler until they’re golden brown. This takes just 30-60 seconds, so keep a close eye on them!
Quick Tip: Brush the cut sides with a light layer of butter or mayonnaise before toasting for extra flavor and a beautiful golden finish.
Step 4: The Art of Burger Assembly
Now comes the fun part – building your burger masterpiece:
- Start with the bottom bun and place a lettuce leaf on it. This creates a moisture barrier that keeps your bun from getting soggy – a game-changer for burger texture!
- Add your perfectly cooked patty with melted cheese.
- Layer with tomato slices, pickles, and onion rings.
- Drizzle your favorite condiments over the toppings. For a quick “special sauce,” mix equal parts mayo and ketchup with a splash of pickle juice.
- Crown your creation with the top bun half and gently press down to secure everything.
And there you have it – a perfect classic burger ready to be devoured! The beauty of this homemade burger recipe is that every step is simple enough for busy weeknights but creates results worthy of a weekend celebration.
Classic Burger Recipe Secrets: Tips for Burger Perfection
Now that we’ve covered the basics, let’s dive into some burger-making tips that will elevate your classic burger from good to absolutely unforgettable!
Burger Cooking Tips & Tricks
The Perfect Patty
The heart and soul of any classic burger is the patty. Here are some game-changing tips to ensure yours is always amazing:
Don’t overhandle the meat: I can’t stress this enough! Treat your ground beef like it’s delicate. The more you work it, the tougher it gets. Mix just until ingredients are combined, then stop. Think of it like making biscuits – gentle hands make tender results.
Temperature matters: Cold patties hold their shape better during cooking, but letting them sit at room temperature for about 15 minutes before cooking helps them cook more evenly. It’s a balancing act, but worth the attention.
The thumb trick: That little indent in the middle of your patty? It’s not just culinary folklore – it really works! As the meat cooks and contracts, that divot prevents your burger from turning into a meatball. Your toppings will thank you for the flat landing surface.
Season liberally: Don’t be shy with the salt! It brings out all the beefy flavor in your patty. Just remember to add it right before cooking, as salt draws out moisture over time.
Resist the urge to press: I know it’s tempting to press down on your patties with a spatula while cooking (the sizzle is so satisfying!), but every press releases precious juices. Those juices = flavor, so hands off once your patty hits the heat!
Beyond the Basics
Bun selection is crucial: The bun-to-patty ratio can make or break your burger experience. Too much bun overpowers the fillings; too little falls apart. My go-to is a brioche bun for its slight sweetness and perfect texture, but potato buns and sesame buns are close runners-up.
Cheese timing: Add cheese during the last minute of cooking and cover your pan to create a mini steam environment that melts it perfectly. If your cheese isn’t melty enough, try adding a tablespoon of water to the pan before covering (not directly on the burger) to create extra steam.
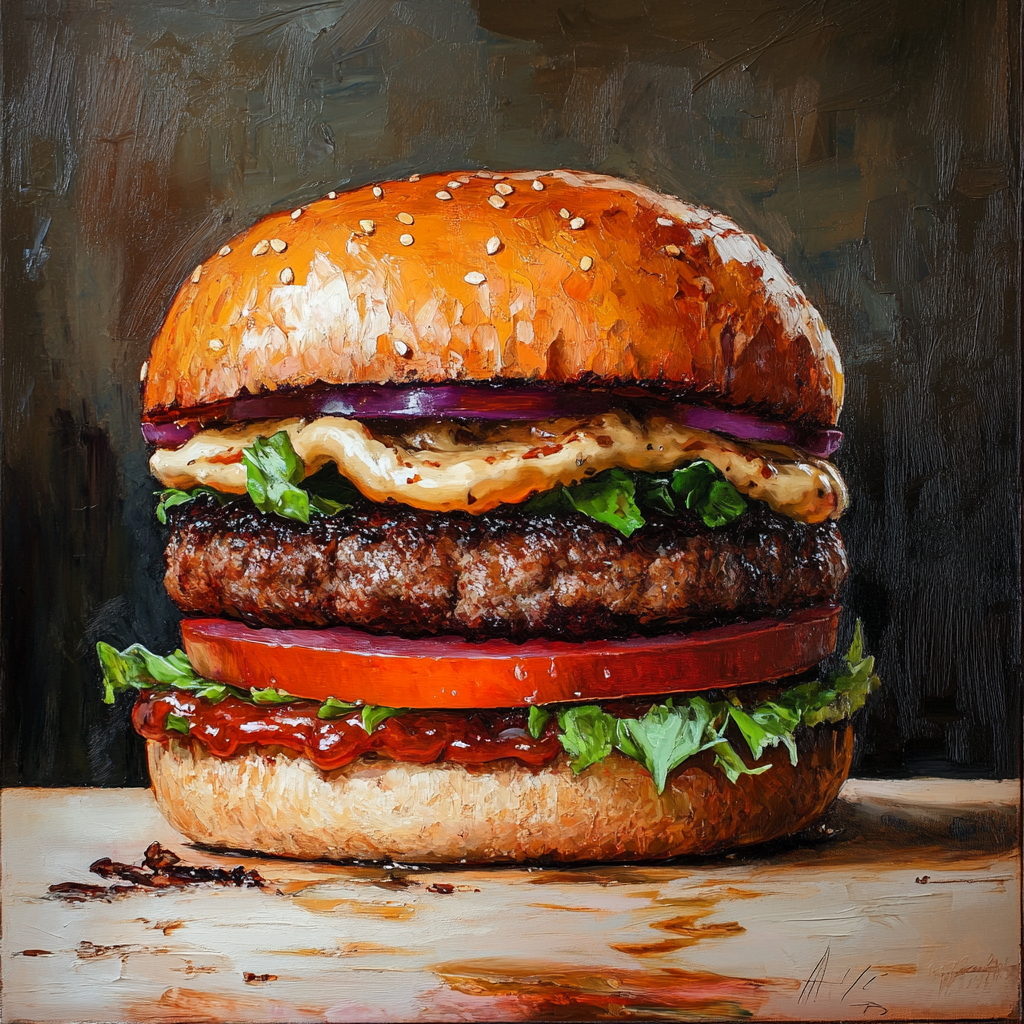
The perfect stack order: There’s actually science behind burger stacking! Start with lettuce on the bottom to prevent soggy buns, then patty, cheese (so it melds with the hot patty), then tomato, onion, and pickles. Condiments can go on either the top bun or above the lettuce layer.
Toasting isn’t optional: It takes just 30 seconds, but toasting your buns adds texture contrast and helps prevent the dreaded “soggy bottom.” Plus, the slight caramelization adds another layer of flavor. Trust me on this one!
When Burger Night Goes Wrong: Troubleshooting
Crumbly patties? Your meat mixture might be too lean. The fat acts as a natural binder, so aim for that 80:20 ratio. If you’re using extra lean meat, try adding an egg as a binder.
Shrinking patties? Make them slightly larger than your bun to begin with. During cooking, all burgers shrink a bit as the proteins contract and release moisture.
Burnt outside, raw inside? Your heat is too high. Medium-high is the sweet spot for burgers. Remember, you can always lower the heat if they’re browning too quickly.
Bland burgers? Salt is your friend! Don’t forget to season both sides of your patty. Also, try adding umami boosters like Worcestershire sauce or a pinch of MSG (yes, it’s actually fine to use in moderation).
A Burger Story from My Kitchen
Last summer, I invited friends over for an impromptu backyard gathering. With just an hour’s notice and nothing planned, I pulled some ground beef from the freezer (quick-thaw hack: seal in a ziplock bag and submerge in cold water), sliced some potatoes for fries, and set up a burger bar on the patio table.
As everyone built their own classic burger masterpieces, adding toppings and sharing laughs, I had that wonderful realization: the best meals aren’t just about the food – they’re about the memories we create around it.
My friend Lisa, who claims to “not really like burgers,” ended up having seconds and asking for my recipe. The secret? Nothing fancy – just attention to details and quality ingredients. Sometimes the simplest foods bring the most joy when they’re done right.
Classic Burger FAQs
Can I make burger patties ahead of time?
Absolutely! Shape your patties, place them between layers of parchment paper, and refrigerate for up to 24 hours or freeze for up to 3 months. If frozen, thaw in the refrigerator overnight before cooking. This burger meal prep trick has saved countless weeknight dinners at my house!
What’s the best meat for a classic burger?
For the juiciest homemade burger, choose ground beef with an 80:20 lean-to-fat ratio. If you’re feeling adventurous, ask your butcher for a custom blend of chuck, brisket, and sirloin. Each cut brings different flavors and fat content to create the ultimate burger experience. If you prefer a leaner option, try adding a tablespoon of olive oil or grated onion to your mixture to maintain moisture.
How do I know when my burger is done?
The most accurate way is using an instant-read thermometer: 125°F for rare, 135°F for medium-rare, 145°F for medium, 155°F for medium-well, and 160°F for well-done. No thermometer? Try the touch test: Rare feels soft like the base of your thumb, medium has some resistance like your chin, and well-done feels firm like your forehead. Remember that carryover cooking will continue to cook your burger slightly after removing it from heat.
Burger Variations to Try
While the classic burger holds a special place in my heart, don’t be afraid to experiment! Here are a few variations that have earned permanent spots in my burger rotation:
The Breakfast Burger: Top your patty with a fried egg, bacon, and a drizzle of maple syrup on a toasted English muffin. Weekend brunch will never be the same!
Mediterranean-Style: Mix some chopped olives and feta into your patty mixture, then top with tzatziki, sliced cucumber, and red onion.
Mushroom Swiss: Sauté mushrooms in butter with thyme until golden brown, then pile them on your patty with Swiss cheese for an earthy, rich burger experience.
Veggie Option: For plant-based guests, marinate large portobello mushroom caps in balsamic vinegar and olive oil before grilling. They have a meaty texture that satisfies even dedicated carnivores.
Building Burger Memories Around the Table
There’s something wonderfully democratic about a classic burger. It crosses cultural boundaries, welcomes customization, and brings people together without pretense. In my experience, some of the best conversations happen around a table of burgers, with hands occupied and guards down.
Consider hosting a burger bar for your next gathering – set out a variety of toppings, cheeses, and condiments and let everyone build their perfect creation. It’s interactive, fun, and takes the pressure off you as the host to please every palate.
The classic burger reminds us that good food doesn’t have to be complicated. Sometimes the simplest dishes bring the most joy when they’re made with care and shared with people we love.
Conclusion: The Timeless Appeal of a Classic Burger
In a world of fleeting food trends and complicated cooking techniques, the classic burger stands as a testament to the power of simplicity. It doesn’t need fancy equipment or hard-to-find ingredients – just a few basics handled with care.
Whether you’re making burgers for a quick family dinner, a weekend cookout, or a special gathering, remember that the magic lies in the details: the perfect meat-to-fat ratio, gentle handling, proper cooking temperature, and thoughtful assembly. Master these basics, and you’ll have a foolproof meal that pleases everyone at your table.
So the next time you’re stumped on what to make for dinner, remember that a classic burger is always a good idea. It’s not just a meal – it’s a canvas for creativity, a vessel for flavors, and most importantly, a vehicle for creating memories around your table.
Happy cooking!
- Looking for the perfect side dish? Check out my Crispy Oven-Baked French Fries that pair perfectly with these burgers!
- For a lighter option, try my Fresh Summer Coleslaw that adds a crisp contrast to the rich burger.
- Want to make your own burger buns? My Homemade Brioche Buns will take your burger experience to the next level.
- For more about the fascinating history of the hamburger, check out Smithsonian Magazine’s article on burger history.
- The USDA provides helpful guidelines on safe cooking temperatures for ground beef to ensure your burgers are both delicious and safe.


