There’s something about a homemade Cherry Pie that just screams “comfort” – that golden, flaky crust giving way to sweet-tart cherries bubbling beneath. As a busy mom of three, I know firsthand that finding time to bake from scratch can feel impossible. But this Cherry Pie recipe? It’s my secret weapon for those days when I want to fill our home with that magical baking aroma and watch my family’s eyes light up when I pull it from the oven.
Hi there! Alexandre here from foodytasty.com, ready to share a Cherry Pie recipe that’s been tested, tweaked, and perfected in my home kitchen. Whether you’re a seasoned baker or someone who usually reaches for the store-bought option (no judgment!), this recipe will guide you through creating a pie that tastes like it came straight from grandma’s kitchen – even if you’re squeezing it in between work calls and soccer practice.
Why You’ll Love This Cherry Pie
Cherry Pie isn’t just dessert – it’s a slice of American tradition that brings people together. What makes this particular Cherry Pie special is its perfect balance of sweet and tart flavors wrapped in a buttery, flaky crust that practically melts in your mouth.
This recipe works beautifully year-round. In summer, when cherries are at their peak, you’ll capture that sun-ripened sweetness. During colder months, frozen cherries work wonderfully, bringing a taste of summer to your winter table. It’s the dessert that transitions effortlessly from casual weeknight treat to holiday table showstopper.
The beauty of this Cherry Pie lies in its versatility. Serving it warm with a scoop of vanilla ice cream creates a magical hot-cold contrast that’s pure bliss. Or, enjoy it at room temperature with your morning coffee (because pie for breakfast is totally acceptable – I don’t make the rules!).
Ingredients You’ll Need for Classic Cherry Pie
For the Filling:
- 4 cups fresh or frozen cherries, pitted: I recommend using a mix of sweet and tart cherries for the most complex flavor. If using frozen cherries (which I often do!), thaw and drain them well to prevent a soggy bottom crust.
- 3/4 cup granulated sugar: This amount creates the perfect balance, but feel free to adjust based on your cherries’ natural sweetness. Those end-of-summer cherries might need less, while early season or frozen ones might need a touch more.
- 3 tablespoons cornstarch: This is our thickening hero! Without it, you’d have cherry soup rather than pie filling. If you’re gluten-free, arrowroot powder works beautifully as a substitute.
- 1 teaspoon pure vanilla extract: Please, please use the real stuff here! The difference between pure and imitation vanilla is night and day in a simple filling like this.
- 1/4 teaspoon almond extract: This is my secret weapon ingredient. It enhances the natural cherry flavor in a way that’s subtle but transformative. If you’re not an almond fan, you can skip it.
- 1 tablespoon freshly squeezed lemon juice: The acidity brightens everything up and makes the cherry flavor pop. Think of it like adding a touch of salt to a chocolate chip cookie – you don’t taste the lemon, but you’d miss it if it wasn’t there.
For the Crust:
- 2 1/2 cups all-purpose flour: The backbone of our flaky crust. If you want to experiment, substituting up to half with whole wheat flour works, though it will give you a slightly denser result.
- 1 teaspoon salt: Salt enhances flavor, even in sweet dishes. Don’t skip it!
- 1 cup cold unsalted butter, cubed: COLD is the operative word here. Cold butter creates those lovely pockets of steam when baking, which translates to flakiness. I sometimes even freeze my butter and grate it into the flour!
- 6-8 tablespoons ice water: The amount you’ll need varies based on your kitchen’s humidity. Start with less and add more as needed until the dough just comes together.
Optional Toppings:
- 1 egg, beaten (for egg wash): This gives your crust that gorgeous golden sheen. If you avoid eggs, a brush of milk works well too.
- Coarse sugar for sprinkling: This adds a delightful crunch and sparkle to the finished pie. Demerara or turbinado sugar are my favorites.
Step-by-Step Cherry Pie Instructions
1. Prepare the Crust
This is where patience pays off, friends! A good pie crust can make or break your Cherry Pie.
In a large mixing bowl, whisk the flour and salt together. Add the cold, cubed butter and work it into the flour using a pastry cutter, two forks, or even your fingertips. Work quickly to avoid warming the butter. You’re aiming for a mixture that resembles coarse crumbs with some pea-sized butter pieces still visible.
Gradually add the ice water, one tablespoon at a time, gently mixing until the dough just comes together. It should hold when you squeeze it but shouldn’t feel wet or sticky. Remember, we can always add more water, but we can’t take it away!
Divide the dough into two equal portions and shape each into a disk about 1-inch thick. Wrap them in plastic wrap and refrigerate for at least 1 hour, or up to 2 days. This resting time allows the gluten to relax and the butter to firm up again, which is crucial for achieving that flaky texture we’re after.
2. Prepare the Cherry Filling
While the dough chills, let’s make the star of the show – that gorgeous ruby filling!
In a medium saucepan, combine the pitted cherries, granulated sugar, cornstarch, vanilla extract, almond extract, and lemon juice. Stir everything together and place over medium heat.
Cook the mixture, stirring frequently (I recommend a wooden spoon or silicone spatula), until the cherries begin to release their juices and the mixture thickens. This usually takes about 8-10 minutes. You’ll know it’s ready when the filling bubbles and coats the back of your spoon.
Remove from heat and let it cool completely. This cooling step is non-negotiable! Hot filling on raw dough creates steam, which leads to a soggy bottom crust – the bane of pie bakers everywhere.
3. Assemble Your Cherry Pie
Preheat your oven to 375°F (190°C) and position a rack in the center of the oven.
Remove one disk of dough from the refrigerator and let it sit at room temperature for about 5-10 minutes, just until it’s pliable enough to roll. On a lightly floured surface, roll the dough into a circle about 12 inches in diameter (about 1/8 inch thick).
Carefully transfer the dough to a 9-inch pie dish. The easiest way to do this is to loosely roll the dough around your rolling pin, then unroll it over the pie dish. Gently press the dough into the bottom and sides of the dish, leaving about 1/2 inch overhang.
Pour the cooled cherry filling into the crust, spreading it evenly.
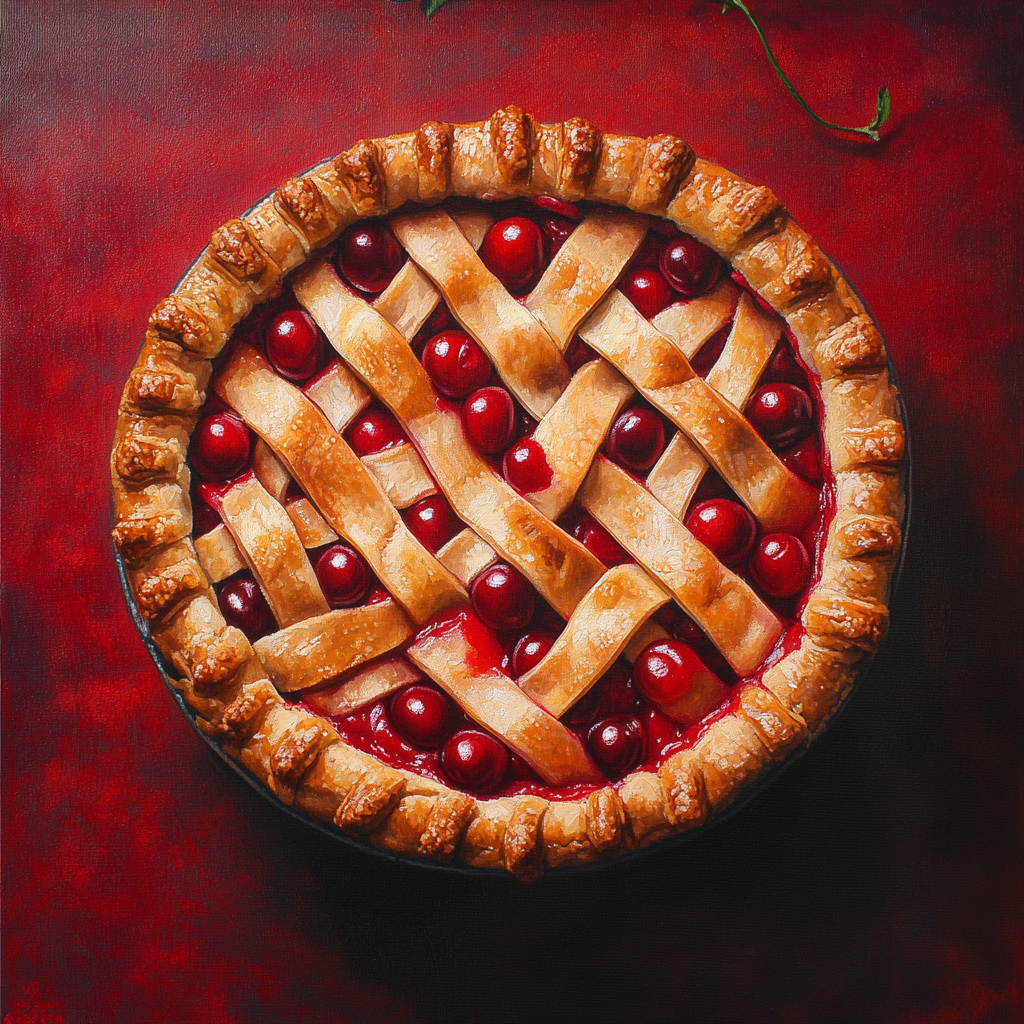
Roll out the second disk of dough just like the first. Now you have options! You can simply place this circle over the filling for a traditional pie, cut decorative slits in the top for ventilation, or get fancy with a lattice pattern. For beginners, I recommend the simple top with slits – it’s classic and beautiful without the fuss.
If using a solid top crust, be sure to cut a few slits to allow steam to escape during baking. Trim any excess dough, then crimp the edges together by pinching with your fingers or pressing with a fork.
4. Add the Finishing Touches
Brush the top crust with the beaten egg wash. This might seem like a small detail, but it’s what gives your Cherry Pie that irresistible golden glow that makes everyone at the table instantly reach for their forks.
If you’re using it, sprinkle the coarse sugar over the egg-washed crust. Besides adding a beautiful sparkle, this creates a delightful crunch that contrasts wonderfully with the tender filling.
5. Bake Your Cherry Pie to Perfection
Place your pie on the middle rack of your preheated oven. I like to put a baking sheet on the rack below to catch any potential drips – because cleaning cherry juice from the bottom of your oven is nobody’s idea of fun!
Bake for 45-50 minutes, or until the crust is golden brown and the filling is visibly bubbling. If you notice the edges browning too quickly (around the 25-minute mark), cover them loosely with aluminum foil or a pie shield.
Once baked, remove your pie from the oven and place it on a wire rack to cool for at least 2 hours. I know – this waiting period feels like torture when your kitchen is filled with the heavenly aroma of freshly baked Cherry Pie. But patience truly is a virtue here. This cooling time allows the filling to set properly, which means clean, picture-perfect slices rather than a delicious but messy cherry avalanche.
Cherry Pie Tips from My Kitchen to Yours
Getting the Perfect Filling Consistency
If you’ve ever cut into a pie only to have filling run everywhere, you know the importance of proper thickening. The cornstarch in this recipe should do the trick, but if your cherries are particularly juicy, you might need an extra teaspoon.
And here’s a little trick I’ve learned over the years: if your filling still seems a bit runny after cooking, add a tablespoon of quick-cooking tapioca. It’s my emergency thickener and has saved many pies in my kitchen!
Crust Troubleshooting
Is your dough cracking when you roll it? It’s probably too cold! Let it sit at room temperature for a few more minutes.
Too sticky? Pop it back in the fridge for 15 minutes. Pie dough responds dramatically to temperature, so use this to your advantage.
Don’t panic if your crimped edges aren’t Food Network-worthy. I like to call those “rustic edges” – they have character and tell the story of a pie made with love rather than machines. Plus, they’ll still taste absolutely delicious!
Make-Ahead Options
Life gets busy, and sometimes you need to work ahead. Good news! You can prepare the dough up to 3 days in advance and keep it refrigerated, or freeze it for up to 3 months.
The filling can be made 1-2 days ahead and stored in the refrigerator. You can even assemble and freeze the entire unbaked pie for up to 3 months – just add about 15 minutes to the baking time when cooking from frozen.
A Cherry Pie Story
The first time I made this Cherry Pie recipe, I was trying to impress my then-boyfriend (now husband) with my culinary skills. What I didn’t mention was that it was only my second attempt at pie-making ever! I nervously pulled the pie from the oven, and to my horror, noticed filling bubbling over one side and onto the baking sheet below.
Instead of the picture-perfect pie I’d imagined, I had what looked like a volcanic cherry eruption. But you know what? When we cut into that lopsided, bubbled-over pie, the flavor was absolutely spectacular. My husband still talks about that “volcano pie” as the moment he knew he wanted to marry me. Sometimes imperfection makes the best memories!
Your Cherry Pie Questions Answered
Can I use canned cherry pie filling instead of making my own?
You can, but I really encourage you to try the homemade filling at least once! The difference in flavor is remarkable, and you can control the sweetness and texture. If you’re really pressed for time, doctor up canned filling with a splash of almond extract and some lemon zest to brighten the flavors.
How do I know when my Cherry Pie is done baking?
Look for three signs: a golden-brown crust, visible bubbling in the filling (especially in the center, not just the edges), and a wonderful fragrant cherry aroma filling your kitchen. If you’re uncertain, bake for the full 50 minutes – an extra few minutes won’t hurt, but an underbaked pie can be disappointing.
Can I make this Cherry Pie without a top crust?
Absolutely! You can make it as an open-faced pie, or get creative with cut-outs or a crumble topping. For a crumble, mix 1 cup flour, 1/2 cup brown sugar, 1/2 teaspoon cinnamon, and 1/2 cup cold butter until crumbly, then sprinkle over the filling before baking.
Serving Suggestions to Elevate Your Cherry Pie
While Cherry Pie is wonderful on its own, there are so many ways to take it to the next level. The classic pairing is warm pie with cold vanilla ice cream – that temperature and texture contrast is simply unbeatable.
For a twist, try a dollop of lightly whipped cream with a hint of almond extract mixed in, or a spoonful of mascarpone cheese for a tangy richness that complements the cherries beautifully.
Cherry Pie is also delightful with a cup of coffee for breakfast (I won’t tell if you don’t!) or with a small glass of amaretto liqueur for an adults-only dessert experience.
Storing Your Cherry Pie
Your Cherry Pie will keep at room temperature, loosely covered with a clean kitchen towel, for up to 2 days. If you need to store it longer, refrigerate it for up to 5 days.
To reheat, place individual slices in a 350°F oven for about 10 minutes or until warmed through. This refreshes the crust and brings back that fresh-baked quality.
If you want to freeze leftover pie, wrap individual slices tightly in plastic wrap and then aluminum foil. They’ll keep for up to 3 months. Thaw in the refrigerator overnight before reheating.
Why This Cherry Pie Recipe Has Stood the Test of Time
There’s something profoundly satisfying about mastering a classic recipe like Cherry Pie. In a world where food trends come and go at lightning speed, dishes like this remind us of what truly matters – creating simple, delicious food that brings people together.
Whether you’re baking this Cherry Pie for a holiday gathering, a weekend family dinner, or just because it’s Wednesday and you deserve something special, know that you’re participating in a beautiful culinary tradition. Every time we roll out pie dough and fill it with sweet-tart cherries, we connect with generations of home cooks who have found joy in the same simple ritual.
The next time you’re looking for a dessert that offers both comfort and wow-factor, I hope you’ll reach for this Cherry Pie recipe. It might seem like a small thing – just flour, butter, cherries, and sugar – but the memories you’ll create around your table? Those are anything but small.
Happy baking, friends! I’d love to hear how your Cherry Pie adventures turn out. And remember, even if your pie isn’t picture-perfect, it’s the love (and butter!) you put into it that counts.
For more classic American desserts, check out my Apple Crisp with Oat Topping or Classic Blueberry Muffins. And if you’re interested in learning more about different varieties of cherries for baking, the USDA Cherry Production Guide offers fascinating insights.


