Have you ever found yourself reaching for that box of store-bought cheese crackers, wishing there was a way to enjoy that same irresistible crunch without the mystery ingredients? Well, my kitchen-loving friend, today’s your lucky day! I’m sharing my absolute favorite recipe for Homemade Cheese-It Crackers that will revolutionize your snack game forever.
As a busy parent myself, I understand the constant battle between convenience and quality when it comes to family snacks. These crackers are my secret weapon – they’re surprisingly easy to make, use ingredients you probably already have in your kitchen, and taste a million times better than anything that comes in a box!
Why You’ll Love These Homemade Cheese-It Crackers
There’s something magical about pulling a tray of golden, cheese-scented crackers from your oven. The aroma alone will have your family gravitating toward the kitchen, wide-eyed and ready to sample. But beyond that incredible smell, there are so many reasons to fall in love with this recipe.
First off, you’re in complete control of what goes into them. No artificial flavors, no preservatives with unpronounceable names – just real, wholesome ingredients that you can feel good about sharing with your loved ones. Plus, there’s that undeniable pride that comes from saying, “I made these from scratch!” when your friends inevitably ask where you bought such delicious crackers.
The versatility is another major perk. These little squares of cheesy goodness can be packed in lunchboxes, served at playdates, offered as after-school snacks, or even dressed up on a cheese board for your next dinner party. They’re the perfect blank canvas for your creativity, too – want them spicier? Add some cayenne. Craving a hint of herbiness? Throw in some dried rosemary or thyme.
The Secret to Perfect Crunchy Cheese Crackers
Let me let you in on a little secret – the key to achieving that perfect balance of crunch and flavor isn’t complicated at all. It comes down to three simple things: quality cheese, proper chilling, and uniform thickness.
When it comes to the cheese, don’t skimp! A good sharp cheddar will give you that bold, tangy flavor that makes these crackers so addictive. And yes, it’s worth taking the time to grate it yourself rather than using pre-shredded (which often contains anti-caking agents that can affect the texture).
The chilling step might seem tempting to skip when you’re in a hurry, but those 30 minutes in the refrigerator make all the difference. They allow the butter to firm up, which means your crackers will bake up crisp and flaky rather than spreading into sad, flat puddles.
And lastly, rolling the dough to an even thickness ensures that every cracker bakes at the same rate – no more burnt edges and undercooked centers!
Ingredients for Homemade Cheese-It Crackers
Here’s what you’ll need to get started on your cracker-making adventure:
- 1 cup sharp cheddar cheese, freshly shredded (the sharper, the better for that signature tangy flavor!)
- 4 tablespoons unsalted butter, chilled and cubed (cold butter is crucial for texture)
- ¾ cup all-purpose flour (the foundation of our cracker structure)
- ½ teaspoon salt (enhances the cheese flavor beautifully)
- ¼ teaspoon smoked paprika (optional, but adds a lovely depth)
- 1-2 tablespoons ice-cold water (just enough to bind everything together)
What I love about this ingredient list is how simple it is – no specialty items that require a special trip to the store. These are pantry staples that transform into something extraordinary when combined.
How to Make Homemade Cheese-It Crackers
Step 1: Make the Dough
Pull out your food processor (or get ready for a bit of arm exercise!) and add your shredded cheddar, cold butter cubes, flour, salt, and smoked paprika if you’re using it. Pulse everything until the mixture looks like coarse sand.
If you don’t have a food processor, don’t worry! You can use a pastry cutter or even your fingertips to work the ingredients together. The goal is to distribute the butter and cheese evenly throughout the flour.
Now, add the ice-cold water one tablespoon at a time, pulsing between additions. You’re looking for the dough to just begin coming together – it should hold when pressed but shouldn’t be sticky. Remember, when it comes to water, you can always add more, but you can’t take it away!
Step 2: Chill the Dough
This is where patience comes into play, my friends. Wrap your dough in plastic wrap, flatten it into a disk (this helps it chill more evenly), and pop it in the refrigerator for at least 30 minutes.
I often make my dough the night before I plan to bake, letting it chill overnight. Not only does this make the rolling process easier, but it also allows the flavors to meld together beautifully. Plus, breaking up the recipe into stages makes it more manageable when you’re juggling a busy schedule!
Step 3: Roll and Cut
Time to preheat your oven to 350°F (180°C) and line a baking sheet with parchment paper. Trust me on the parchment paper – it prevents sticking and makes cleanup a breeze!
Lightly flour your countertop and rolling pin, then unwrap your chilled dough disk. Working gently but confidently, roll the dough to about ⅛-inch thickness. Don’t worry if it’s not perfect – these are homemade crackers, after all! Their charm lies in their rustic, handcrafted appearance.
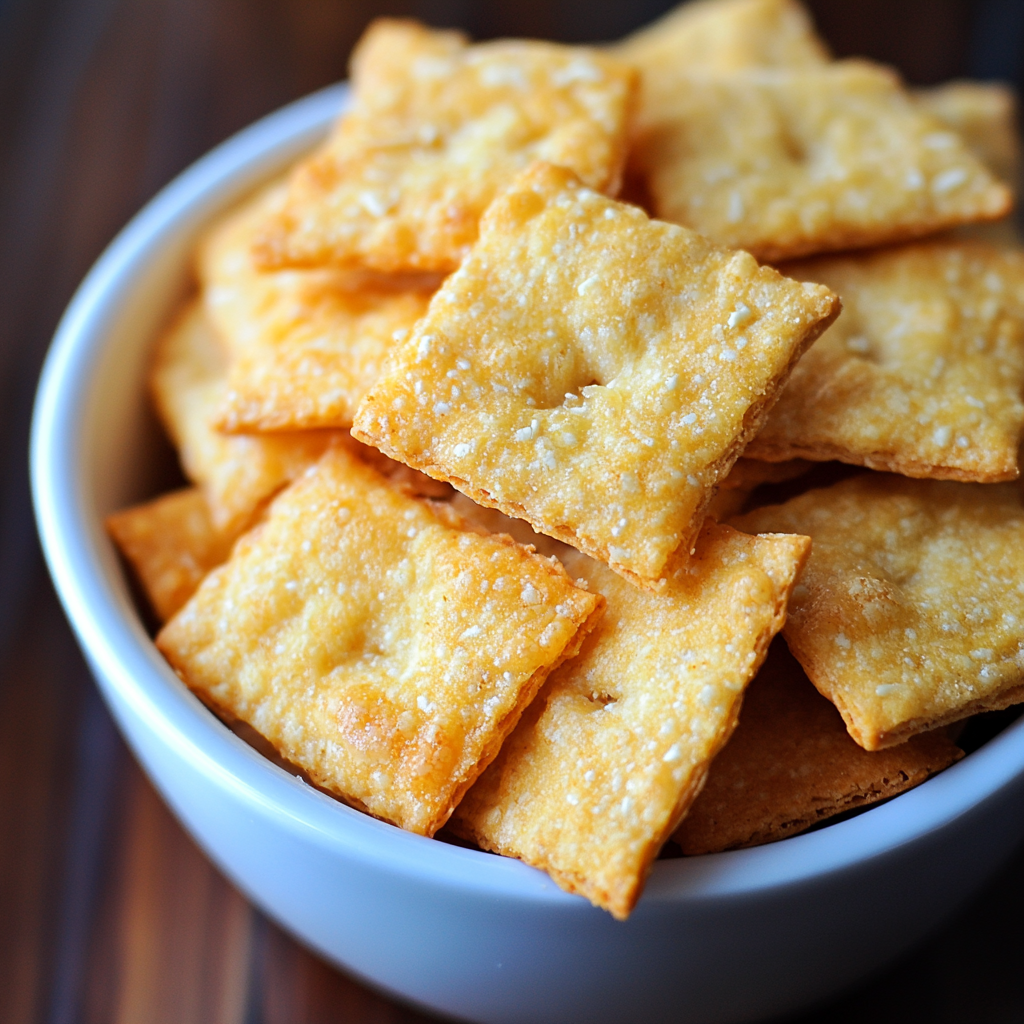
Now for the fun part – cutting the dough into those iconic little squares! A pizza cutter works wonderfully for this, but a sharp knife will do the trick too. I aim for roughly 1-inch squares, but you can make them whatever size suits your fancy. Don’t forget that signature hole in the center of each cracker! A simple poke with a toothpick or the tip of a thermometer is all it takes.
My kids always want to help with this step, and I happily oblige. Yes, their squares end up looking more like abstract art, but they taste just as delicious, and the joy on their faces as they create their own special crackers is worth every oddly-shaped result!
Step 4: Bake to Perfection
Transfer your cut crackers to the prepared baking sheet, leaving a little space between each one. They don’t spread much, so you can place them fairly close together.
Pop them into your preheated oven and set a timer for 10 minutes. This is the point where I usually hover near the oven, drawn by the increasingly mouthwatering aroma of baking cheese. You’re looking for the edges to turn golden brown while the centers firm up – usually between 10-12 minutes total.
Pro tip: Rotate your baking sheet halfway through to ensure even browning. Every oven has hot spots, and this simple step helps achieve that picture-perfect batch of crackers.
Once they’re done, resist the urge to immediately transfer them to a cooling rack. Let them cool completely on the baking sheet first – they’ll continue to crisp up as they cool, achieving that perfect snap we’re after!
Step 5: Serve and Store
Now comes the hardest part of the whole recipe – not eating them all in one sitting! These crackers are absolutely irresistible straight from the baking sheet, still slightly warm with their intense cheese flavor.
For any crackers lucky enough to survive the initial tasting frenzy, store them in an airtight container at room temperature. They’ll maintain their crunch for about a week, though I’ve rarely seen a batch last more than a couple of days in my house!
Cooking Tips That Will Make Your Cheese Crackers Even Better
Want to elevate your homemade cheese crackers from great to absolutely spectacular? Here are some of my tried-and-true tips:
- Cheese matters: Pre-shredded cheese often contains anti-caking agents that can affect the texture of your crackers. Take the extra minute to grate your own – your taste buds will thank you!
- Embrace imperfection: Did some of your crackers come out a bit wonky-looking? That’s what I call “rustic charm”! Remember, we’re going for homemade appeal, not factory precision.
- Temperature is key: Make sure both your butter and water are COLD. Warm butter will create a different texture entirely – still tasty, but not the flaky crunch we’re aiming for.
- Don’t overwork the dough: Mix just until the ingredients come together. Overworking develops gluten, which can make your crackers tough rather than tender and crisp.
- Season creatively: While the basic recipe is a crowd-pleaser, don’t be afraid to experiment with different seasonings! Ranch powder, Italian herbs, or even a pinch of cayenne can create exciting variations.
A Little Story From My Kitchen
Last weekend, my daughter’s friends came over for an impromptu playdate. Instead of reaching for the usual store-bought snacks, I pulled out a batch of these cheese crackers I’d made the day before. The look of genuine surprise on the kids’ faces when I told them the crackers were homemade was priceless!
“Wait, you can MAKE these?” one wide-eyed 7-year-old asked me, clearly having his worldview expanded on the spot.
That’s exactly why I love sharing recipes like this one. It’s not just about the delicious result (though that’s certainly a perk!); it’s about showing our children that real food doesn’t have to come from a factory or a drive-through window. The simple act of making crackers from scratch becomes a life lesson about creativity, capability, and caring enough to make something with your own hands.
And yes, I sent each child home with a small bag of crackers and the recipe for their parents. Spreading the homemade snack love, one playdate at a time!
Your Burning Questions About Homemade Cheese Crackers, Answered!
Can I use a different type of cheese for these homemade crackers?
Absolutely! While sharp cheddar gives you that classic cheese cracker flavor, this recipe works beautifully with all sorts of hard cheeses. Parmesan creates an intensely savory cracker, while Gouda adds a subtle smokiness. Pepper Jack brings a nice heat if you’re looking for a spicier snack. Feel free to experiment with cheese blends too – half cheddar and half Gruyère is one of my family’s favorites!
How can I make these cheese crackers gluten-free?
Great news for my gluten-sensitive friends – these crackers adapt wonderfully to gluten-free baking! Simply substitute your favorite cup-for-cup gluten-free flour blend for the all-purpose flour. You might need to adjust the water slightly, as gluten-free flours sometimes absorb moisture differently. The end result may have a slightly different texture, but will still deliver that cheesy, crunchy goodness you’re craving.
Can I make the dough ahead of time?
You absolutely can, and I often do! The dough keeps beautifully in the refrigerator for up to three days. You can also freeze it for up to a month – just wrap it well in plastic wrap and then place it in a freezer bag. When you’re ready to bake, let the frozen dough thaw overnight in the refrigerator before rolling it out. It’s a fantastic way to prepare for parties or to have homemade snacks ready to bake on busy weeknights.
Beyond the Basic Cracker: Creative Serving Ideas
While these crunchy cheese crackers are absolutely divine on their own, they can also be the star of so many snacking scenarios:
- Pair them with your favorite dips for an elevated appetizer platter. They hold up beautifully to hummus, spinach artichoke dip, or even a simple herb-infused olive oil.
- Crumble them over soups or salads as a flavorful alternative to croutons.
- Include them on a cheese board alongside some complementary cheeses, fresh fruits, and honey for a sophisticated snack spread.
- Pack them in lunchboxes with a little container of marinara sauce for “pizza crackers” – a hit with kids and adults alike!
- Use them as the “bread” in mini sandwich bites for party appetizers – a small slice of cucumber, a dab of cream cheese, and a homemade cheese cracker creates an irresistible one-bite delight.
From My Kitchen to Yours
Making your own Homemade Cheese-It Crackers is more than just preparing a snack – it’s creating an experience. There’s something uniquely satisfying about transforming simple ingredients into something so delicious that your family will gather around the kitchen island, eager for the first taste.
In our busy lives, finding moments to connect through food becomes increasingly precious. These crackers might seem like a small thing, but they represent something bigger – taking back control of what we feed ourselves and our loved ones, understanding exactly what goes into our food, and sharing the joy of creating something special together.
So next time you’re tempted to grab that box of store-bought crackers, I hope you’ll remember this recipe and give it a try instead. The extra effort is minimal, but the difference in flavor, quality, and personal satisfaction is immeasurable.
Happy baking, friends! I’d love to hear how your homemade cheese crackers turn out – and what creative variations you come up with!
More Delicious Recipes to Try
If you enjoyed these homemade cheese crackers, you might also love these other family favorites:
- Crispy Baked Zucchini Chips – Another crunchy snack option that’s surprisingly healthy!
- Easy Homemade Pizza Dough – Perfect for family pizza night, with the same satisfaction of making something from scratch.
- Classic Chocolate Chip Cookies – Because sometimes, only a warm, homemade cookie will do.
For more information about the science behind cheese-making, check out this fascinating article from The Spruce Eats on how different cheeses are created.
Want to learn more about the history of crackers? Serious Eats has a wonderful deep dive into how these crunchy snacks became a pantry staple.


