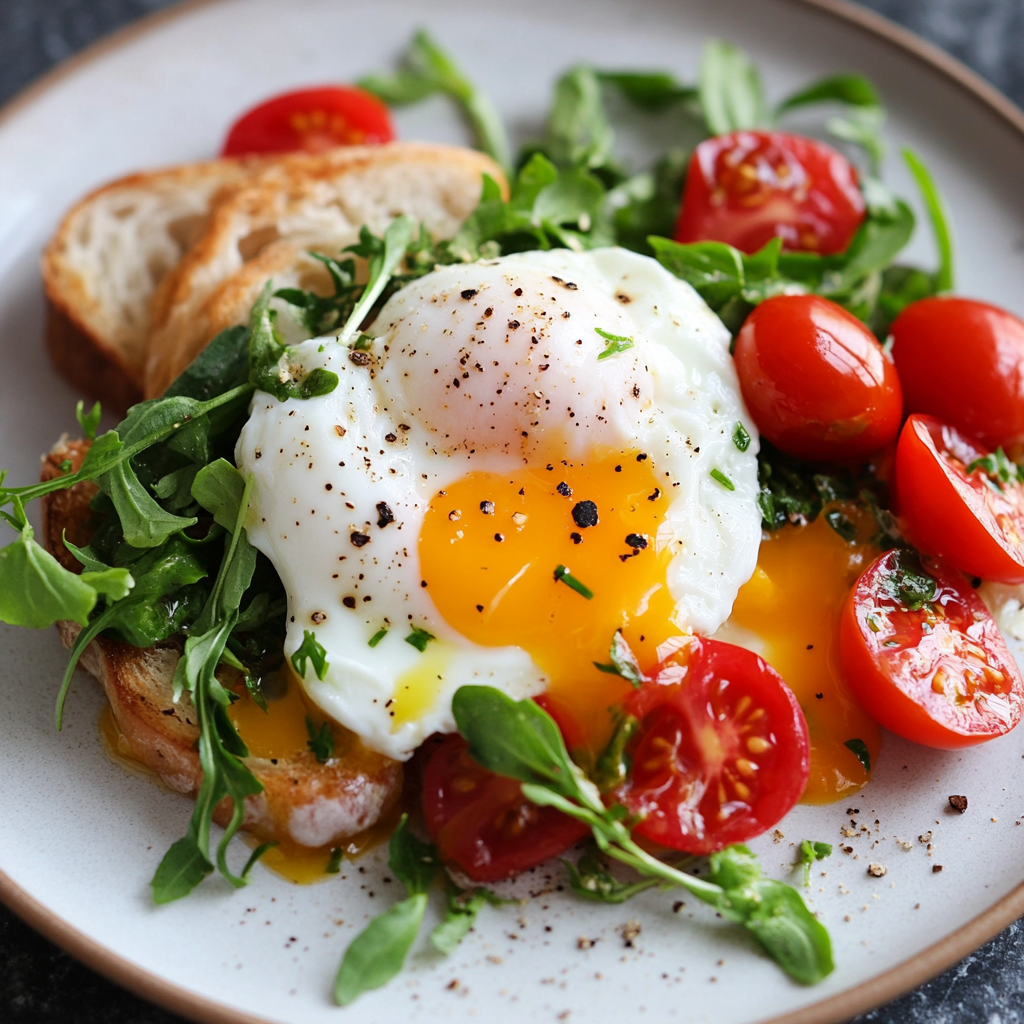
Have you ever ordered poached eggs at a fancy brunch spot and wondered, “How do they make them look so perfect?” Trust me, I’ve been there! For years, poached eggs felt like that elusive culinary achievement that was reserved for professional chefs in pristine white coats. But here’s the good news – mastering poached eggs isn’t rocket science. It’s actually quite simple once you understand a few key principles.
Why You’ll Love These Perfect Poached Eggs
Poached eggs are the unsung heroes of the breakfast world. Without any added fats or oils, they’re naturally lighter than their fried counterparts, yet they deliver that same satisfying protein punch to start your day. The best part? That moment when your fork breaks through the tender white and releases that rich, golden yolk – pure breakfast magic!
What makes poached eggs so special is their versatility. Sure, they shine on their own with just a sprinkle of salt and pepper, but they can also transform ordinary dishes into extraordinary meals. A plain avocado toast becomes Instagram-worthy with a perfectly poached egg on top. A simple salad turns into a satisfying lunch. Even a bowl of ramen gets an upgrade when crowned with a poached egg.
If you’ve been intimidated by poached eggs in the past, I completely understand. I spent years avoiding them myself, convinced they required some sort of culinary superpower. But after countless test runs in my kitchen (and yes, plenty of mishaps along the way), I’ve broken down the process into foolproof steps that anyone can follow – even if you’re juggling morning chaos with kids, pets, or just trying to get out the door on time.
The Science Behind Poached Eggs (And Why It Matters)
Before we dive into the how-to, understanding a little bit about the science can make all the difference. Poaching is essentially cooking an egg without its shell in water that’s hot but not boiling. The ideal temperature range is between 180°F and 190°F – hot enough to cook the whites but gentle enough to keep everything together.
When egg whites heat up, their proteins unfold and form new bonds, causing them to solidify. The fresher your eggs, the tighter and more cohesive these whites will be. This is why fresh eggs are so important for perfect poached eggs – their whites hold together better in the water.
Adding a splash of vinegar or lemon juice to your poaching water isn’t just an old wives’ tale – it actually helps accelerate this protein coagulation, allowing the whites to set faster before they have a chance to disperse in the water. Science in the kitchen – who knew?
What You’ll Need for Perfect Poached Eggs
Let’s gather our simple ingredients and tools:
Ingredients:
- Fresh eggs (the fresher, the better!)
- Water
- 1 tablespoon white vinegar or fresh lemon juice (optional, but recommended)
- Salt and pepper to taste
Equipment:
- Medium-sized saucepan or deep skillet
- Slotted spoon
- Small bowl or ramekin
- Paper towels
- Timer or clock
Nothing fancy here! I bet you already have everything you need in your kitchen.
Step-by-Step Poached Egg Instructions
1. Prepare Your Workspace
Fill your saucepan with about 3 inches of water. Having enough depth is important – you want the eggs to have plenty of room to form their shape without touching the bottom of the pan.
Set out your other tools within reach. Trust me, once you start poaching, things move quickly, and you’ll want everything at your fingertips.
2. Heat the Water Just Right
Place your pan over medium heat and bring the water to a gentle simmer. You’re looking for tiny bubbles forming at the bottom of the pan, but not a rolling boil. If you have a kitchen thermometer, aim for that sweet spot between 180°F and 190°F.
Too hot, and the aggressive bubbles will tear your egg apart. Too cool, and the whites won’t set properly. This gentle simmer is your poaching goldilocks zone.
3. Add a Splash of Acid (Optional but Helpful)
Now’s the time to add about a tablespoon of white vinegar or lemon juice to the water. Don’t worry – your eggs won’t taste like vinegar! The acid helps the whites coagulate faster, giving you that picture-perfect shape.
4. Crack with Care
Instead of cracking your egg directly into the simmering water (a recipe for disaster, trust me), crack it into a small bowl or ramekin first. This gives you more control and lets you check for any shell fragments.
Look at your egg – if the white seems very watery with a separate, thicker white around the yolk, you can carefully drain off some of the watery white. This isn’t necessary, but it can help create a more compact poached egg.
5. Create the Perfect Whirlpool
This is my favorite trick: with a spoon, stir the water in one direction to create a gentle whirlpool. The centrifugal force helps wrap the whites around the yolk, forming that classic poached egg shape.
6. Ease It In
With your whirlpool spinning, bring your bowl close to the water’s surface and gently slide the egg into the center of the vortex. The swirling water will help the egg white wrap around the yolk.
If you’re new to poaching, start with just one egg at a time. Once you gain confidence, you can poach multiple eggs in succession (though I’d still recommend not crowding the pan).
7. Time It Perfectly
Now, hands off! Let the egg cook undisturbed for:
- 3 minutes for very runny yolks
- 4 minutes for soft, slightly runny yolks
- 5-6 minutes for firmer yolks
I’m a 4-minute girl myself – I love when the yolk is set just at the edges but still flows beautifully when cut.
8. The Gentle Lift
Using your slotted spoon, carefully lift the egg from the water. Hold it over the pan for a moment to let excess water drain away, then dab the bottom of the spoon on a paper towel to absorb any remaining water.
9. Serve and Savor
Transfer your poached egg to your prepared dish, whether that’s buttered toast, avocado toast, a salad, or simply a plate. Season with salt and freshly ground pepper, and marvel at your handiwork before diving in!
Troubleshooting Your Poached Eggs
Even experienced cooks sometimes encounter poached egg problems. Here are some common issues and simple fixes:
If Your Whites Spread Too Much
- Your eggs might not be fresh enough. Try using the freshest eggs possible.
- The water might not be hot enough. Make sure it’s at a gentle simmer.
- Next time, add a bit more vinegar to the water to help the whites set faster.
If Your Yolk Breaks Before Cooking
- You might be handling the egg too roughly. Always crack into a bowl first and slide in gently.
- Try lowering the bowl closer to the water’s surface before sliding the egg in.
If Your Egg Sticks to the Pan
- The water might be too shallow. Make sure you have at least 3 inches of water.
- Check that your water is hot enough before adding the egg.
Ways to Enjoy Your Poached Eggs
Now that you’ve mastered the perfect poached egg, here are some delicious ways to enjoy them:
Classic Avocado Toast
Mash ripe avocado on toasted sourdough, top with your poached egg, a sprinkle of red pepper flakes, and a drizzle of olive oil. Simple perfection!
Elevated Breakfast Bowl
Layer roasted sweet potatoes, sautéed greens, and a poached egg in a bowl. The yolk creates a natural sauce that brings everything together.
Quick Eggs Benedict
Toast an English muffin, add a slice of ham or smoked salmon, top with your poached egg and a spoonful of hollandaise sauce (store-bought is fine for busy mornings!).
Remember, practice makes perfect with poached eggs. Even if your first few attempts don’t look Instagram-ready, they’ll still taste delicious!
Pro Tips for Poached Egg Perfection
After years of poaching eggs in my kitchen (and cleaning up my fair share of eggy water), I’ve collected some game-changing tips that’ll take your poached eggs from “pretty good” to “how did you do that?!”
The Fresh Egg Test
Not sure if your eggs are fresh enough for poaching? Here’s a simple test: fill a glass with water and gently place your egg inside. If it sinks to the bottom and lays flat on its side, it’s super fresh and perfect for poaching. If it stands upright on the bottom, it’s still usable but not ideal. If it floats to the top, it’s time to toss it!
The Strainer Trick
If you’re really serious about picture-perfect poached eggs, try cracking your egg into a fine mesh strainer first. Give it a gentle shake to let the watery part of the white drain away, leaving just the firmer white that will wrap beautifully around your yolk. Is this extra? Absolutely. Is it worth it for those special brunches? You bet!
Make-Ahead Magic
Need to poach eggs for a crowd? You can actually poach them up to 24 hours ahead! Just cook them for about 30 seconds less than you normally would, then transfer them to an ice bath. When you’re ready to serve, gently reheat them in warm (not simmering) water for about 1 minute. Brunch party, solved!
The Muffin Tin Method
If traditional poaching seems too stressful, try this alternative: fill the cups of a muffin tin with water, crack an egg into each one, and bake at 350°F for about 13-15 minutes. Are they technically poached? Well, not really – but they’ll give you a similar result with less hands-on effort.
My Poached Egg Journey
I still remember my first attempt at poached eggs – it was a Sunday morning, and I was trying to impress my visiting in-laws with a fancy brunch. Let’s just say what emerged from my pot looked more like egg drop soup than those beautiful café-style eggs I was aiming for! My mother-in-law, bless her heart, ate them anyway and declared them “creative.”
Fast forward to countless test runs and YouTube tutorials, and poached eggs have become my signature breakfast. My kids now request “cloud eggs” (their cute name for poached eggs) perched on top of toast soldiers for weekend breakfasts. There’s something so satisfying about watching them dip those toast strips into the flowing golden yolk with such concentration on their little faces.
What I love most about mastering poached eggs is how they’ve elevated our simple weekday breakfasts. Even on hectic mornings when everyone’s rushing out the door, I can quickly poach an egg to top a piece of toast or a bowl of leftovers, transforming a basic meal into something that feels special. It’s those little touches that make everyday meals memorable.
Frequently Asked Questions About Poached Eggs
Can I poach eggs in the microwave?
You technically can, but I don’t recommend it. Microwave poached eggs tend to explode (yes, really!) if you’re not extremely careful. The traditional stovetop method gives you much more control and consistently better results. If you’re short on time, the muffin tin method I mentioned above is a safer alternative to microwaving.
Why did my egg whites turn out rubbery?
The most likely culprit is overcooking or water that’s too hot. Remember, we want a gentle simmer, not a rolling boil. And keep a close eye on your timer – even an extra minute can take your eggs from silky to rubbery. If you’re aiming for soft, runny yolks, 3-4 minutes is usually the sweet spot, depending on the size of your eggs.
Can I flavor the poaching water?
Absolutely! While plain water with a splash of vinegar is the classic approach, you can get creative with your poaching liquid. Try adding herbs like thyme or rosemary, a squeeze of lemon, or even poach your eggs in leftover soup broth for an extra flavor dimension. Just remember that whatever you poach in will subtly flavor your eggs.
Perfect Pairings for Your Poached Eggs
Now that you’ve mastered the art of poaching eggs, let’s talk about what to serve them with. While avocado toast is a classic pairing (for good reason!), there’s a whole world of poached egg possibilities to explore.
Breakfast Favorites
- Fluffy Buttermilk Pancakes – Top with a poached egg and a drizzle of maple syrup for a sweet-savory combination
- Crispy hash browns – The contrast between crunchy potatoes and soft eggs is absolutely divine
- Sautéed greens – Spinach or kale with garlic makes a nutritious bed for your poached egg
Lunch Options
- Grain bowls – Try quinoa or farro with roasted vegetables and a poached egg on top
- Fresh Mediterranean Salad – A poached egg adds protein and creates a creamy dressing when the yolk breaks
- Ramen or udon noodles – Channel your inner chef with a restaurant-quality noodle bowl
Global Inspirations
For a taste of international cuisine, try these poached egg variations:
- Shakshuka – A Middle Eastern dish where eggs are poached directly in a spiced tomato sauce
- Eggs Florentine – The vegetarian cousin of Eggs Benedict, featuring spinach instead of ham
- Japanese onsen tamago – Slow-cooked eggs with a unique, custard-like texture
The Versatility of Poached Eggs
One of the reasons I love poached eggs so much is their incredible versatility. They can transition seamlessly from breakfast to dinner, from casual to elegant. They’re equally at home on a weekday breakfast plate or as part of a sophisticated weekend brunch spread.
For busy parents and professionals, poached eggs offer that rare combination of being both nutritious and quick to prepare. With about 6 grams of protein per egg and essential nutrients like vitamin D, B vitamins, and choline, they’re a powerhouse of nutrition that takes just minutes to cook.
And let’s talk about that beautiful moment when you cut into a perfectly poached egg and the yolk creates an instant sauce for whatever it’s sitting on. That rich, velvety texture transforms even the simplest ingredients into something special. It’s like nature’s perfect sauce, no whisking required!
Creating Your Poached Egg Ritual
There’s something meditative about the process of poaching eggs – the gentle swirl of the water, the careful crack of the shell, the patient waiting as the egg transforms. In our busy lives, these small cooking rituals can become moments of mindfulness.
I encourage you to embrace the process rather than just focusing on the result. Yes, a picture-perfect poached egg is satisfying, but so is the journey of mastering a new skill in the kitchen. Each time you poach an egg, you’ll learn something new about technique, timing, or your own preferences.
Start your weekend mornings with a poached egg ritual – perhaps with some gentle music playing, a cup of coffee steaming nearby, and the satisfaction of creating something beautiful for yourself or your loved ones. These simple pleasures are what make home cooking so rewarding.
Conclusion: Your Poached Egg Adventure Begins
Poached eggs might seem like a small culinary achievement, but they represent something bigger – the joy of mastering a technique that transforms simple ingredients into something special. With each egg you poach, you’re connecting to a culinary tradition that spans cultures and generations.
Whether you’re making your first attempt or your fiftieth, remember that every poached egg is a small victory. Some will be picture-perfect, others might be a bit wonky – but all of them will be delicious. The beauty of home cooking isn’t perfection; it’s the love and effort that go into creating something nourishing for yourself and others.
So the next time you’re standing over a pot of simmering water, watching the whites wrap around the yolk of your poached egg, take a moment to appreciate the simple magic happening before your eyes. That’s what cooking is all about – transforming the ordinary into the extraordinary, one egg at a time.
Now, grab those fresh eggs from your refrigerator and get poaching! Your perfect poached egg adventure is just beginning.
For more breakfast inspiration, check out my recipes for Overnight Oats Three Ways or The Ultimate French Toast. And if you’re looking for more egg-cellent ideas, the American Egg Board has a wealth of information about egg nutrition and cooking techniques.


