Have you ever stood in the cereal aisle, squinting at ingredient labels and feeling your eyebrows raise at prices for what’s essentially… oats in a fancy box? Friend, I’ve been there too! That’s exactly why I want to share my absolute favorite homemade granola recipe with you today.
There’s something almost magical about starting your morning with a bowl of homemade granola that you created with your own hands. The satisfying crunch, the warm nutty aroma filling your kitchen, and that perfect balance of sweet and savory flavors come together to create not just breakfast, but a moment of joy in your busy day.
Why You’ll Love This Homemade Granola
Let’s be honest – mornings can be chaotic. Between getting the kids ready for school, preparing for work meetings, or simply trying to function before that first cup of coffee kicks in, breakfast often becomes an afterthought. That’s where this homemade granola truly shines!
Unlike store-bought versions that often hide behind fancy packaging while secretly harboring alarming amounts of sugar and preservatives, this homemade granola puts you in complete control. You’ll know exactly what’s going into your family’s bodies – no mysterious ingredients with unpronounceable names here!
Plus, this isn’t just any granola recipe – it’s incredibly versatile. Having a household with different taste preferences? No problem! This recipe becomes your canvas, allowing everyone to customize their perfect breakfast bowl. My daughter loves adding extra cinnamon and dried cherries, while my son is all about the chocolate chips (which, between us, I sometimes sneak in too!).
Making your own granola also means saying goodbye to those eye-watering price tags at specialty food stores. Using simple pantry staples, you’ll create a breakfast that’s not only healthier but also kinder to your wallet. And let me tell you – the aroma of this granola baking in your oven? Better than any scented candle you’ll ever buy!
What Makes This Granola Recipe Special
What sets this homemade granola apart is its perfect balance of textures and flavors. Each spoonful delivers that satisfying crunch we all crave, with clusters that hold together beautifully (perfect for snacking by the handful – we’ve all been there!).
The natural sweetness from honey or maple syrup means you’re avoiding the refined sugars found in commercial options. And unlike those store-bought versions that sometimes taste like they’ve been sitting on the shelf since last summer, this homemade granola bursts with freshness.
I’ve spent years tweaking this recipe, finding the perfect baking temperature and time to achieve those golden clusters without burning. Trust me, once you master this recipe, you’ll never go back to the boxed stuff again!
Ingredients for Your Perfect Homemade Granola
Here’s everything you’ll need to create a batch of crunchy, nutty, and utterly delicious homemade granola. The beauty of this recipe lies in its flexibility – feel free to swap ingredients based on what you have in your pantry!
- 3 cups rolled oats (the heart of any good granola)
- 1 cup nuts or seeds (almonds, walnuts, pecans, or seeds like pumpkin or sunflower)
- 1/2 cup shredded coconut (optional, but adds wonderful texture)
- 1/2 cup dried fruits (raisins, cranberries, chopped apricots, or dried mango)
- 1/4 cup honey or maple syrup (nature’s perfect sweeteners)
- 1/4 cup melted coconut oil or neutral vegetable oil
- 1 teaspoon vanilla extract (don’t skip this – it adds wonderful depth!)
- 1/2 teaspoon ground cinnamon (the secret to that warm, cozy flavor)
- A pinch of salt (balances the sweetness beautifully)
How to Make Homemade Granola Step by Step
Creating your own granola isn’t just easy – it’s actually fun! Follow these simple steps, and you’ll have a batch of golden, crunchy goodness ready to enjoy in no time.
Step 1: Preheat and Prepare
First things first – preheat your oven to 325°F (160°C). This moderate temperature is key for achieving that perfect golden color without burning. While your oven is warming up, line a large baking sheet with parchment paper. This not only prevents sticking but also makes cleanup a breeze – because who wants to scrub pans when they could be enjoying granola instead?
Step 2: Mix the Base Ingredients
In a large mixing bowl, combine your rolled oats, nuts or seeds, shredded coconut (if using), cinnamon, and salt. Give everything a good stir until well mixed.
I like to roughly chop larger nuts like almonds or walnuts – it helps them distribute more evenly throughout the granola and creates a more consistent texture. Plus, there’s something oddly satisfying about the rhythmic chop-chop-chop on a cutting board, don’t you think?
Step 3: Prepare the Wet Ingredients
In a separate bowl, whisk together your honey (or maple syrup), melted coconut oil, and vanilla extract until the mixture is smooth and fully combined. If your kitchen is chilly and your honey has thickened, warm it slightly in the microwave for 10-15 seconds – it’ll be much easier to mix!
This wet mixture is what binds everything together and creates those perfect clusters we’re after. The oil helps create that irresistible crunch, while the sweetener and vanilla bring warmth and depth to the flavor profile.
Step 4: Combine and Spread
Now for the fun part! Pour your wet mixture over the dry ingredients. Using a spatula (or clean hands if you’re like me and enjoy getting tactile with your food), mix thoroughly until every oat and nut is evenly coated. This step is crucial for achieving that perfect crunch – take your time here to make sure nothing is left dry.
Once everything is well-coated, spread the mixture onto your prepared baking sheet in a single, even layer. Using a spatula, gently press it down. This little trick helps create those lovely clusters we all fight over in the finished granola.
Step 5: Bake to Perfection
Slide your tray into the preheated oven and bake for 20-25 minutes, giving it a gentle stir halfway through to promote even browning. Your kitchen will soon fill with the most incredible aroma – warm, nutty, and slightly sweet. It’s the kind of smell that makes family members suddenly appear in the kitchen asking, “What’s cooking?”
Keep a close eye on your granola during the last 5 minutes – it can go from perfectly golden to overdone rather quickly! You’re looking for a light golden color across most of the mixture.
Step 6: Cool and Add Dried Fruits
Once baked, remove your granola from the oven and let it cool completely on the baking sheet. Resist the temptation to stir it too much at this point! Letting it cool undisturbed allows those beautiful clusters to form as the granola crisps up.
After cooling, gently stir in your dried fruits. We add these after baking because dried fruits tend to burn in the oven, and nobody wants hard, bitter raisins in their beautiful granola!
Step 7: Store and Enjoy
Transfer your finished granola to an airtight container, where it will keep at room temperature for up to 2 weeks. Though between us, it rarely lasts that long in my house!
Helpful Tips for Granola Success
After years of making this homemade granola (and honestly, after a few memorable mishaps), I’ve gathered some wisdom I’m happy to share with you!
First and foremost, don’t overcrowd your baking sheet. I learned this the hard way when I tried to double the recipe without increasing the pan size. The result? A sad, unevenly baked granola that was both burnt and undercooked at the same time – quite a culinary achievement, actually! For perfect results, spread your mixture in a thin, even layer with a bit of breathing room.
Another game-changer? The “leave it alone” technique. While it’s tempting to stir your granola frequently during baking (I’m a notorious checker and stirrer by nature), restraint pays off here. Stirring too often breaks up those beautiful clusters. Instead, give it just one gentle stir halfway through, then let it do its thing.
Having trouble with your granola burning around the edges? Place your oven rack in the middle position rather than the lower third. This simple adjustment creates more even heat distribution and can save your granola from the dreaded burnt edge syndrome!
If you’re finding your granola isn’t clumping enough (we all want those satisfying clusters!), try this trick: after mixing your wet and dry ingredients, squeeze handfuls of the mixture together before spreading it on the baking sheet. These compression points create perfect cluster starting points.
And for those days when you’re feeling adventurous, try adding a tablespoon of nut butter to your wet ingredients. It adds incredible flavor depth and helps create even better clusters. My personal favorite? A spoonful of almond butter with a dash of cardamom – trust me, it’s heavenly!
Our Family’s Granola Story
I still remember the Sunday morning I first made this homemade granola recipe. It was during that strange pandemic period when we were all rediscovering our kitchens. The kids were restless, I was tired of baking banana bread (weren’t we all?), and the breakfast routine needed shaking up.
As the granola baked, my youngest wandered into the kitchen, following the scent like a cartoon character floating toward a windowsill pie. “What’s that smell?” he asked, his eyes wide with anticipation. When we finally sat down to taste our creation – crunchy, warm, and topped with fresh berries – silence fell over our usually chaotic breakfast table. The only sounds were appreciative crunching and the occasional “Mmm!”
Now it’s become our Sunday tradition. The kids help measure and mix, sneaking tastes of coconut and dried fruits along the way. Sometimes we get creative – our “movie night” granola includes a sprinkle of dark chocolate chips and a touch of sea salt, while our “fall harvest” version features pumpkin seeds, dried cranberries, and extra cinnamon.
These moments in the kitchen, these simple acts of creating something delicious together, have become precious memory-makers in our home. And isn’t that what family food traditions are all about?
Your Homemade Granola Questions Answered
Can I make this granola without nuts?
Absolutely! This homemade granola recipe is wonderfully adaptable for allergies or preferences. Simply replace the nuts with additional seeds like sunflower, pumpkin, or flax seeds. You can also increase the oats slightly or add some puffed rice for extra crunch without nuts. The result is still deliciously crunchy and packed with healthy nutrients – just make sure to keep an eye on baking time, as nut-free versions sometimes cook a bit faster.
How can I make my granola form better clusters?
The secret to perfect granola clusters lies in three key factors. First, don’t skimp on the wet ingredients – the honey/maple syrup and oil work together as binding agents. Second, gently press your granola mixture down onto the baking sheet before baking. Third (and perhaps most important), resist the urge to stir too frequently during baking and allow the granola to cool completely before breaking it up. For extra-clustery granola, try adding a beaten egg white to your wet ingredients – it creates magical binding properties that result in those coveted granola chunks!
How can I store homemade granola to keep it fresh longest?
For maximum freshness, store your homemade granola in an airtight container at room temperature for up to two weeks. If you live in a particularly humid climate, add a food-grade silica packet to absorb moisture (those little packets you find in new shoes work perfectly!). For longer storage, keep your granola in the refrigerator for up to a month or in the freezer for up to three months. The freezer method is especially helpful if you’ve made a large batch – simply scoop out what you need and return the rest to the freezer. The granola maintains its crunch beautifully either way!
Beyond Breakfast: Creative Ways to Enjoy Your Homemade Granola
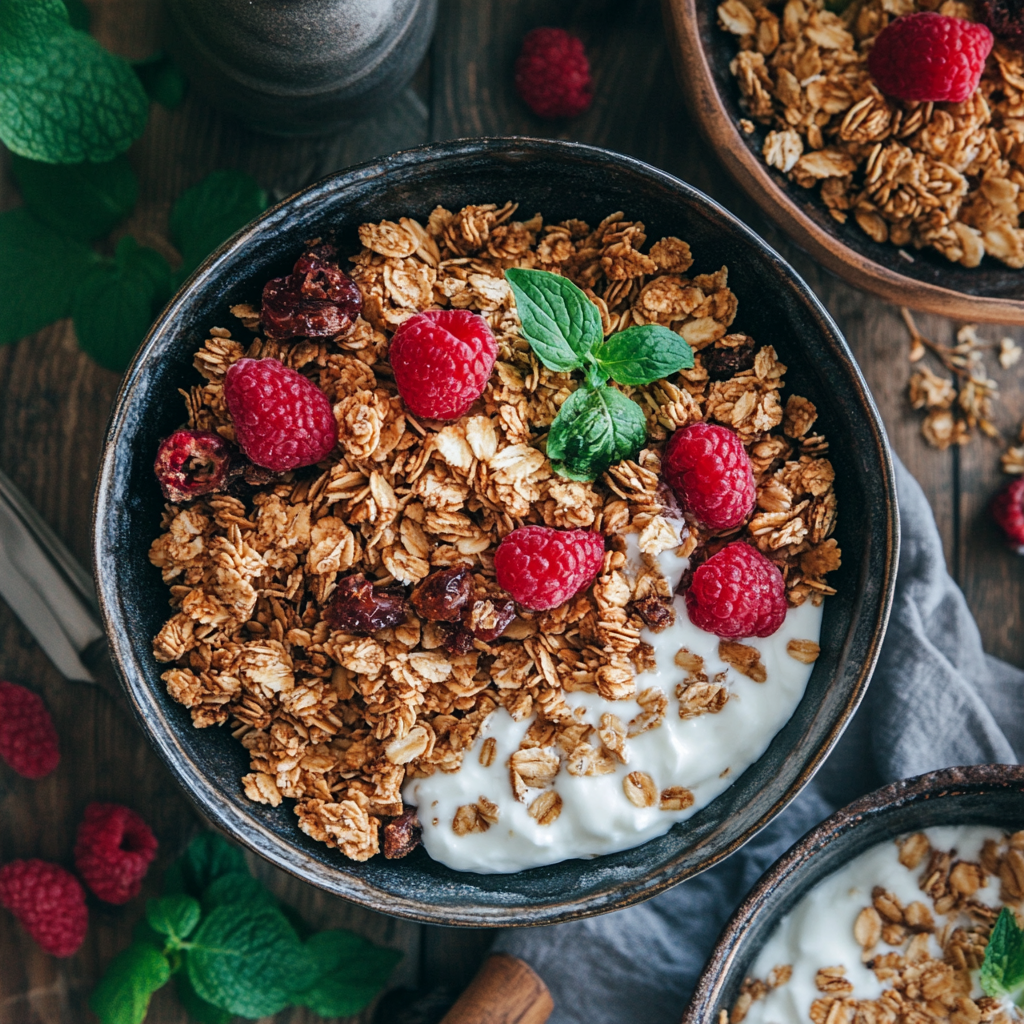
While a bowl of this crunchy homemade granola with milk or yogurt makes a perfect breakfast, don’t limit yourself! This versatile creation deserves to shine beyond the morning hours.
Try layering it with Greek yogurt and fresh fruit in a clear glass for an Instagram-worthy parfait that’s as beautiful as it is delicious. These make stunning quick desserts when unexpected guests drop by – they’ll never know it took you all of two minutes to assemble!
Speaking of desserts, try sprinkling this granola over a scoop of vanilla ice cream with a drizzle of honey. The contrast between cold, creamy ice cream and crunchy granola is simply divine. My kids call this “breakfast for dessert” and request it regularly.
For a quick energy boost, mix a handful of this granola with some dark chocolate chips and dried cherries for a trail mix that will power you through afternoon slumps. I keep small containers of this mix in my car and desk drawer for emergency snacking situations!
When baking muffins or quick breads, try sprinkling some granola on top before baking for an added dimension of texture. It creates a beautiful rustic crust that elevates even the simplest banana bread to coffee-shop quality.
And don’t forget about gift-giving! This homemade granola packaged in a Mason jar with a handwritten tag makes a thoughtful housewarming or teacher appreciation gift. I’ve even included recipe cards with the jars, spreading the homemade granola love to friends and family.
The Joy of Making Homemade Granola
There’s something deeply satisfying about creating staple foods from scratch. In our world of convenience and pre-packaged everything, taking the time to make something as simple as granola connects us to our food in a meaningful way.
When you make homemade granola, you’re not just preparing breakfast – you’re crafting an experience. You’re filling your home with welcoming aromas that say “something wonderful is happening here.” You’re taking control of what goes into your body, choosing quality ingredients that nourish rather than just fill.
I find there’s a certain mindfulness in the process – measuring ingredients, mixing by hand, listening for that perfect moment when the granola is baked just right. In our busy lives, these small moments of creation and attention matter. They ground us, center us, and remind us of the simple pleasures that make a house feel like home.
So the next time you reach for that expensive bag of granola at the store, remember this recipe waiting for you at home. Remember that in just 30 minutes, you could be creating something infinitely more delicious, more nourishing, and more meaningful. Your homemade granola journey begins here – and I can’t wait to hear where it takes you!
Looking for More Breakfast Inspiration?
If you enjoyed this homemade granola recipe, you might also love our Overnight Oats with Fresh Berries for another make-ahead breakfast option that’s both healthy and delicious.
For weekend brunch, our Fluffy Buttermilk Pancakes pair beautifully with a sprinkle of this granola and fresh fruit on top!
And if you’re looking for more ways to use those rolled oats in your pantry, check out our Healthy Banana Oatmeal Muffins – they freeze beautifully for grab-and-go breakfasts.
For more information about the nutritional benefits of oats, the Harvard School of Public Health offers excellent resources on why this humble grain deserves superfood status.
And if you’re curious about different varieties of honey and their unique flavors, the National Honey Board provides a fascinating guide that might inspire your next batch of granola!
Remember, homemade granola isn’t just a recipe – it’s an invitation to slow down, create something wonderful with your own hands, and share a little homemade joy with those you love. Happy baking, friends!


