Have you ever had one of those mornings where the world feels just a bit too hectic? The kids are running around, your coffee’s gone cold (again), and breakfast needs to happen somehow? I’ve been there more times than I can count. That’s why I absolutely treasure recipes like these homemade English muffins that bring a little pocket of joy to those chaotic mornings.
There’s something almost magical about splitting open a warm English muffin and watching as butter melts into all those perfect little nooks and crannies. It’s a simple pleasure that somehow makes everything better, even if just for a moment. And while grabbing a package at the store is certainly convenient, I promise you – making them at home is an experience worth having at least once.
Why You’ll Love These Homemade English Muffins
First off, let’s talk about flavor. Store-bought English muffins are fine, but homemade ones? They’re in a different league entirely. The fresh, yeasty aroma that fills your kitchen as they cook on the griddle is worth the effort alone. And that first bite? Pure bliss.
But it’s not just about taste. Making English muffins from scratch gives you complete control over the ingredients. No preservatives, no artificial flavors – just simple, wholesome components that you probably already have in your pantry. For busy parents or professionals watching what goes into their family’s food, this is a serious win.
Plus, there’s something deeply satisfying about creating something with your own hands. In our world of instant everything, taking the time to mix dough, watch it rise, and transform it into something delicious feels almost revolutionary. It’s a small act of creation that brings an outsized amount of joy.
And let’s not forget – homemade English muffins make your entire home smell like a bakery. If you’re looking to impress overnight guests or simply want to give your family a special weekend breakfast, the aroma alone is worth the effort.
Ingredients You’ll Need
Here’s everything you’ll need to make these delicious English muffins:
- 3½ cups all-purpose flour
- 1½ teaspoons salt
- 2 tablespoons granulated sugar
- 2¼ teaspoons (1 packet) active dry yeast
- 1 cup warm plant-based milk (about 110°F)
- 2 tablespoons plant-based butter, melted
- 1 large egg or egg substitute
- Cornmeal (for dusting)
The beauty of this recipe is its simplicity. No fancy ingredients required – just basics that create something extraordinary when combined with a little love and patience.
How to Make Perfect English Muffins at Home
Step 1: Wake Up Your Yeast
Baking with yeast might sound intimidating if you’re new to homemade bread, but I promise it’s actually quite forgiving. Think of yeast as tiny sleeping organisms that need a gentle wake-up call.
In a small bowl, combine your warm plant-based milk with the sugar. The milk should feel warm to the touch, but not hot – think of the temperature of a nice bath. Too hot and you’ll kill the yeast; too cold and it won’t activate properly.
Sprinkle your yeast over the top and let it sit for 5-10 minutes. When it’s ready, you’ll see it get foamy and bubbly – that’s how you know it’s awake and ready to work its magic on your dough. If nothing happens after 10 minutes, your yeast might be past its prime, and it’s better to start over with fresh yeast.
Step 2: Create Your Dough
In a large mixing bowl, whisk together the flour and salt. This helps distribute the salt evenly, which is important because salt can inhibit yeast if they come into direct contact.
Add your now-foamy yeast mixture, melted plant-based butter, and egg (or egg substitute if you’re keeping things vegan). Mix everything together until a sticky dough forms.
Don’t worry if it looks a bit shaggy at first – that’s completely normal. Keep mixing until everything comes together. If the dough feels impossibly sticky, add flour a tablespoon at a time until it’s manageable. But resist the urge to add too much – a slightly sticky dough will give you those perfect nooks and crannies we’re after.
Step 3: Knead and Let It Rise
Turn your dough onto a lightly floured surface. Now comes the fun part – kneading! Think of kneading as a mini arm workout that also happens to create delicious bread. Press the heel of your hand into the dough, fold it over, give it a quarter turn, and repeat.
You’ll want to knead for about 8-10 minutes until the dough becomes smooth and elastic. Not sure if you’ve kneaded enough? Try the windowpane test: take a small piece of dough and gently stretch it. If you can stretch it thin enough to see light through it without tearing, you’re good to go!
Place your kneaded dough in a lightly greased bowl, cover it with a clean kitchen towel, and let it rise in a warm spot for 1-1.5 hours. You’re looking for it to roughly double in size. This is the perfect time to catch up on that book you’ve been meaning to finish, or let’s be real – fold that mountain of laundry that’s been giving you the side-eye all week.
Step 4: Shape Your Muffins
Once your dough has doubled in size, it’s time to punch it down. This isn’t just a fun stress reliever – it actually releases the large air bubbles so you get that perfect English muffin texture.
Roll the dough out to about ½-inch thickness on a floured surface. Now grab a round cutter (or a drinking glass in a pinch) and cut out circles from your dough. Waste not, want not – gather the scraps, re-roll them, and cut out more circles until you’ve used all your dough.
Sprinkle a baking sheet generously with cornmeal, then place your muffin circles on top. The cornmeal isn’t just for show – it gives that distinctive texture to the bottom of your English muffins and prevents sticking. Dust the tops with more cornmeal, cover them again, and let them rise for another 30 minutes.
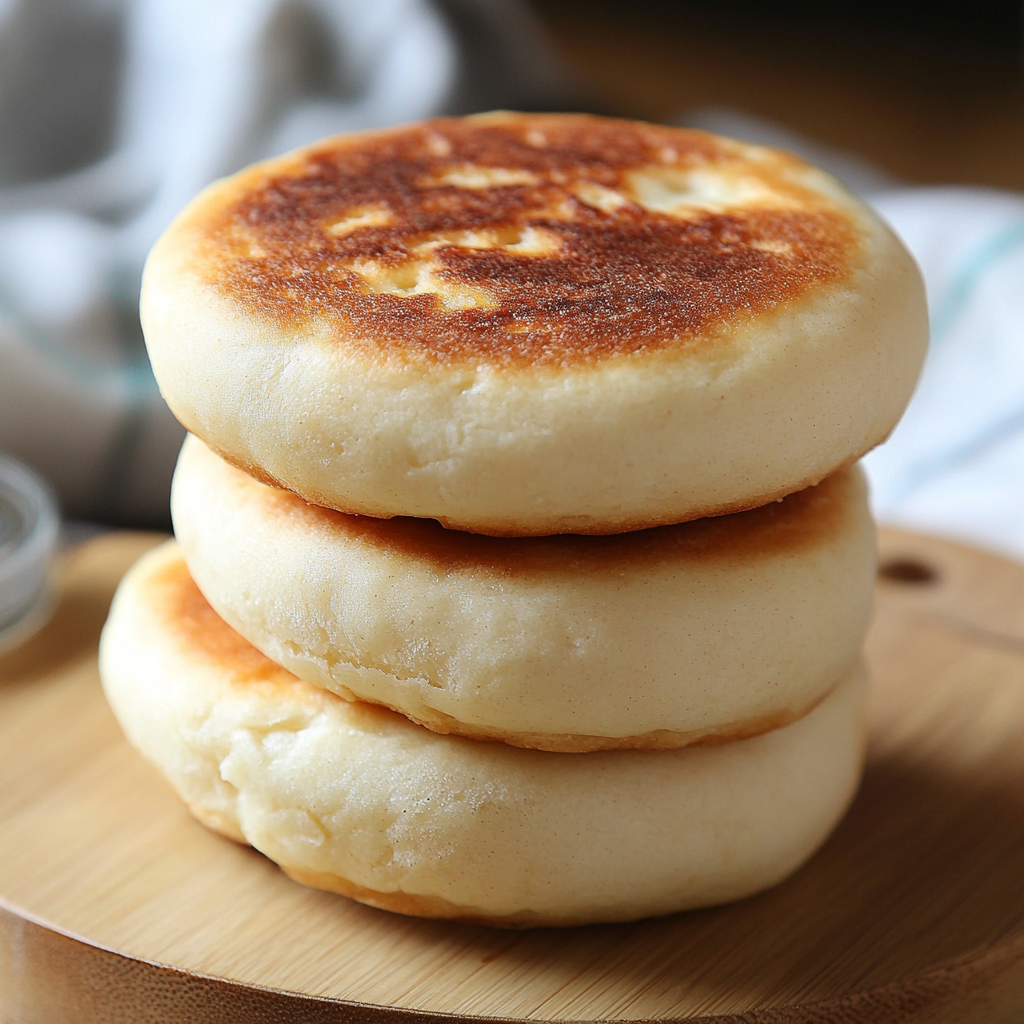
Step 5: Cook to Golden Perfection
Now for the transformation! Heat a griddle or large skillet over medium-low heat. You don’t want it too hot – low and slow is the name of the game here for evenly cooked muffins.
Carefully transfer your risen muffin rounds to the griddle and cook for about 7-8 minutes on each side until they’re golden brown. It’s a bit like making pancakes, but with the satisfaction of knowing you’re creating breakfast bread from scratch!
You’ll know they’re done when they’re golden brown on both sides and sound hollow when you tap the bottom – that’s baker’s morse code for “I’m ready!”
Step 6: The Moment of Truth
Transfer your cooked muffins to a wire rack to cool completely. The hardest part? Waiting. But trust me, it’s worth it.
Once they’ve cooled, grab a fork (not a knife!) and split them open. Why a fork? It preserves those magnificent nooks and crannies that make English muffins so special. Cutting with a knife compresses them, while gently prying them open with a fork maintains their perfect texture.
Tips for English Muffin Success
I’ll let you in on a little secret – my first batch of English muffins looked more like English pancakes. Flat, sad little discs that had my kids asking, “Um, Dad, what are those supposed to be?” But that’s the beauty of baking – every “oops” teaches you something!
The Perfect Temperature
Yeast is like Goldilocks – it wants things just right. Too hot and it dies; too cold and it naps instead of working. If your kitchen is chilly (hello, winter mornings!), create a warm spot by turning your oven on for just a minute, then turning it off and placing your covered dough inside. That gentle warmth creates the perfect rising environment.
The Fork Split Technique
Got dense muffins without those gorgeous nooks and crannies? You might be using a knife! The fork-split method isn’t just tradition; it’s science. Inserting the tines of a fork around the circumference and gently prying open preserves the irregular texture we love. A knife cuts through, compressing those air pockets we worked so hard to create. It’s like giving your muffins a tight hug when they need space to show off their personality!
Griddle Temperature Management
Is your first batch always perfect but the second batch burns faster than you can say “breakfast”? That’s because griddles keep accumulating heat. After your first batch, lower the heat slightly or give your pan a quick cool-down moment. Remember, these beauties need gentle heat to cook through without scorching.
Sticky Dough Salvation
If your dough is sticking to everything including possibly the ceiling (we’ve all been there), resist the temptation to add tons more flour. Instead, lightly oil your hands or use a bench scraper to handle the dough. A slightly sticky dough means airy muffins with – you guessed it – better nooks and crannies!
A Family Tradition in the Making
Every Sunday morning in our house follows the same beautiful chaos. My youngest pulls a chair to the counter, eager to help mix the dough. My oldest carefully measures ingredients with the seriousness only a 10-year-old can muster. And my partner wanders in, coffee in hand, to steal a freshly cooked muffin straight off the griddle.
“Dad’s making the holey bread!” has become our weekend battle cry. What started as a curious kitchen experiment has become our family’s most cherished tradition.
I still remember the look on my daughter’s face the first time she split open a homemade English muffin and watched the butter melt into all those perfect little holes. “It’s like a tiny maze for the butter to explore,” she whispered in awe. Sometimes the simplest foods create the most magical moments.
Your English Muffin Questions, Answered
Can I make these ahead of time?
Absolutely! These homemade English muffins are perfect for busy morning meal prep. Once completely cooled, store them in an airtight container at room temperature for up to 2 days. For longer storage, they freeze beautifully for up to 3 months. The best part? You can toast them straight from frozen – no need to defrost first. Just pop them in the toaster for a minute or two longer than you normally would. It’s like having a little breakfast insurance policy in your freezer at all times!
Why didn’t my muffins get those classic nooks and crannies?
The secret to those beautiful nooks and crannies lies in three key factors. First, make sure your dough has enough hydration – a slightly sticky dough is what you want. Second, give the dough enough time to rise properly, as this develops those air pockets. And third, use a fork to split them rather than a knife. If your first batch isn’t perfect, don’t worry! Homemade bread baking is a journey, and each batch gets better as you become more familiar with how the dough should feel and behave during the process.
Can I make these without dairy or eggs?
Yes! This recipe is already designed to work with plant-based milk and butter. For the egg, you can use a flax egg (1 tablespoon ground flaxseed mixed with 3 tablespoons water, let sit for 5 minutes until gel-like) or a commercial egg replacer. The texture might be slightly different, but they’ll still be delicious. Many of my readers have reported that the vegan version actually develops even better nooks and crannies – a happy baking accident that everyone can enjoy!
Beyond Breakfast: English Muffin Magic
While I’ll always treasure a simple buttered English muffin with my morning coffee, these versatile rounds can be so much more than just breakfast fare.
Try using them as the base for mini pizzas for a quick lunch. My kids love assembling their own with tomato sauce, cheese, and whatever toppings we have on hand. Six minutes under the broiler and dinner is served – faster than delivery and infinitely more satisfying.
For an elegant yet simple appetizer, toast muffin rounds, then top with cream cheese and smoked salmon or a slice of ripe avocado with a squeeze of lemon and a sprinkle of red pepper flakes. Cut into quarters and watch them disappear at your next gathering.
And don’t forget the classic egg sandwich! A toasted English muffin hugging a perfectly cooked egg with melted cheese is breakfast nirvana. Add a slice of tomato and some fresh spinach, and you’ve got a portable, nutritious meal that puts fast food options to shame.
From Novice to Kneading Pro
The beauty of homemade bread is that it connects us to one of humanity’s oldest traditions. For thousands of years, people have combined flour, water, and yeast to create sustenance. There’s something deeply satisfying about participating in that lineage, even in our modern kitchens with our busy lives.
If this is your first foray into bread baking, congratulations! English muffins are actually a perfect gateway recipe. They’re more forgiving than many other breads, don’t require a special oven or baking stone, and give you a wonderful sense of accomplishment relatively quickly.
And if you’re a seasoned baker, these homemade English muffins might just become your new weekend project. Try adding different flavors – a handful of shredded cheddar and some chives, or perhaps some cinnamon and raisins for a sweeter version.
Sharing the Love
There’s something about homemade bread that just begs to be shared. Package up a few freshly made English muffins with a small jar of jam for a thoughtful housewarming or thank-you gift. Include a copy of the recipe if you’re feeling generous!
I’ve found that baking these with children creates not just delicious food but precious memories. There’s something magical about watching a child’s face light up when they see the dough double in size – it’s like a science experiment you can eat!
If you’re looking for more breakfast inspiration, you might enjoy my Overnight French Toast Casserole that lets you wake up to an almost-ready breakfast. Or for another homemade bread project, try my Easy Homemade Bagels that bring New York flavor right to your kitchen.
For a comprehensive guide on working with yeast, check out King Arthur Flour’s yeast baking guide, which has helped countless bakers master the art of bread making.
The Joy of Homemade English Muffins
As the last muffin cools on the rack and your kitchen fills with that irreplaceable aroma of freshly baked bread, take a moment to appreciate what you’ve created. These aren’t just English muffins; they’re little rounds of joy that transform ordinary mornings into something special.
In our fast-paced world where convenience often trumps quality, taking the time to make something from scratch is a small act of rebellion. It says, “This matters. This moment matters. The food I feed myself and my loved ones matters.”
So split one of those warm homemade English muffins, watch as the butter melts into all those perfect nooks and crannies, and take a bite. That first taste – slightly crisp exterior giving way to a soft, chewy center – is the reward for your efforts.
And as you savor that perfect bite, perhaps you’ll understand why I believe that the best things in life aren’t just eaten; they’re created, shared, and remembered. These homemade English muffins might just become your new breakfast tradition, creating memories around your table for years to come.
Happy baking, friends!


