There’s something about a perfectly made Classic Coleslaw that just makes a meal feel complete. Whether you’re planning a backyard barbecue, packing for a picnic, or simply looking for a fresh side to brighten up your weeknight dinner, this timeless dish delivers in both flavor and simplicity. As someone who’s tested countless coleslaw recipes over the years, I’m thrilled to share my absolutely foolproof version that strikes that perfect balance between creamy, crunchy, tangy, and sweet.
Why You’ll Love This Classic Coleslaw
Let’s be honest—we’ve all had disappointing coleslaw. You know the kind: soggy, bland, drowning in dressing, or worse, bone dry. But this Classic Coleslaw recipe? It’s the real deal. What makes it special is the attention to balance. The crisp, fresh cabbage maintains its crunch even after being dressed, while the creamy dressing coats each shred perfectly without turning the whole thing into a soupy mess.
This recipe has become my go-to for good reason. It’s incredibly versatile, complementing everything from pulled pork sandwiches to grilled chicken. It’s also wonderfully make-ahead friendly—in fact, it actually improves with a little time in the refrigerator as the flavors meld together. For busy folks (I see you, multitasking parents and professionals!), that’s a huge win.
Best of all, this Classic Coleslaw comes together in minutes with ingredients you likely already have on hand. No fancy techniques or special equipment required—just honest, delicious food that makes everyone at the table happy.
The Simple Ingredients That Make Amazing Coleslaw
The beauty of Classic Coleslaw lies in its simplicity. With just a handful of fresh ingredients, you can create something truly spectacular:
For the Vegedatas:
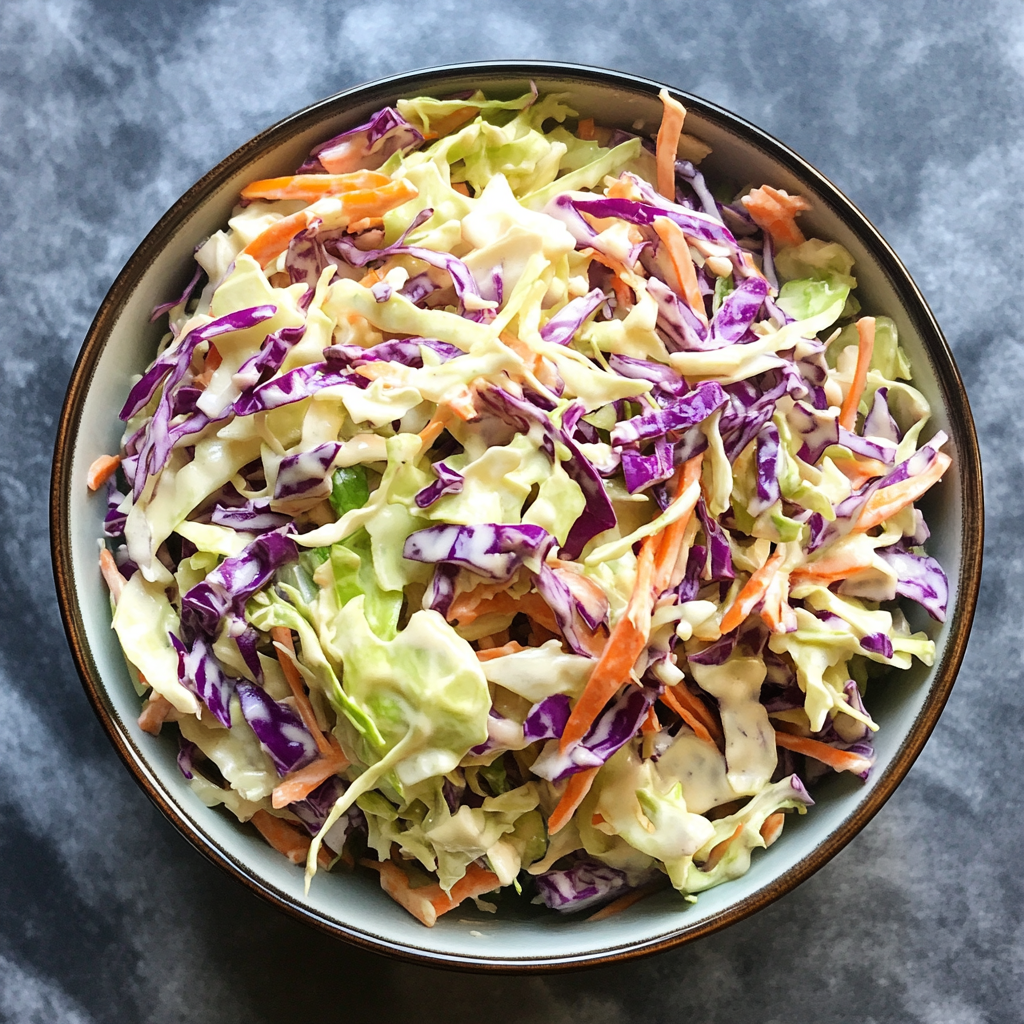
- 4 cups shredded green cabbage: The star of the show! Look for firm, heavy heads with crisp leaves.
- 1 cup shredded purple cabbage (optional): Adds gorgeous color contrast and a slightly different flavor profile.
- 1 cup shredded carrots: Brings natural sweetness and that beautiful pop of orange.
For the Dressing:
- 1/2 cup high-quality mayonnaise: This forms the creamy base of our dressing. Choose a brand you love—it makes a difference!
- 2 tablespoons apple cider vinegar: Provides that perfect tangy kick that balances the richness.
- 1 tablespoon sugar: Just enough sweetness to round out the flavors.
- 1 tablespoon Dijon mustard (optional): Adds complexity and a subtle zip.
- 1/2 teaspoon celery seed (optional): A traditional addition that brings an earthy depth.
- Salt and pepper to taste: Never underestimate the power of proper seasoning!
What I love about this ingredient list is how adaptable it is. On a health kick? Swap half the mayo for Greek yogurt. Don’t have purple cabbage? No problem—just use all green. The foundation stays the same, but you can easily make it your own.
How to Make Perfect Classic Coleslaw Every Time
Creating this cabbage salad is surprisingly straightforward, but a few key techniques will elevate your coleslaw from good to absolutely crave-worthy. Let’s break it down:
Step 1: Prepare Your Vegedatas
The way you cut your cabbage makes a huge difference in the final texture of your coleslaw. For the best results:
- Remove any wilted outer leaves from your cabbage heads.
- Cut each cabbage into quarters and carefully remove the tough core.
- Using a sharp knife, slice the cabbage into thin, uniform shreds. You can also use a food processor with the slicing attachment or a mandoline slicer if you have one—just watch those fingers!
- Peel and shred your carrots using a box grater or the shredding attachment on your food processor.
Pro Tip: If you have a few extra minutes, place your shredded cabbage in a colander and sprinkle it with a teaspoon of salt. Let it sit for about 15 minutes, then gently squeeze out excess moisture with a clean kitchen towel. This draws out extra water, helping your coleslaw stay crisp longer after it’s dressed.
Step 2: Craft the Perfect Dressing
The dressing is where the magic happens in any Classic Coleslaw. Here’s how to nail it:
- In a medium bowl, whisk together the mayonnaise, apple cider vinegar, and sugar until completely smooth.
- Add the Dijon mustard and celery seed (if using), along with a good pinch of salt and freshly ground black pepper.
- Taste and adjust seasoning. This is important! The dressing should be tangy, slightly sweet, and well-seasoned.
Kitchen Wisdom: If your dressing seems too thick, add a tiny splash of water or extra vinegar to thin it out. If it’s too tangy, a pinch more sugar will balance things out. Trust your taste buds here.
Step 3: Combine and Chill
Now comes the moment of truth—bringing everything together:
- Place your shredded vegetables in a large mixing bowl. Make sure it’s bigger than you think you need to allow for proper tossing.
- Pour about three-quarters of the dressing over the cabbage mixture.
- Using tongs or two large spoons, gently toss everything together until the vegedatas are evenly coated. Be gentle—aggressive mixing can bruise the cabbage and make it release water.
- Assess the situation: Do you need more dressing? Add the remainder if needed, but remember that good coleslaw shouldn’t be swimming in dressing.
- Cover the bowl with plastic wrap or transfer to an airtight container.
- Refrigerate for at least one hour before serving, though 2-3 hours is even better. This resting time is crucial for flavor development!
I can’t emphasize enough how important that chilling time is. Something magical happens as the coleslaw rests in the refrigerator—the flavors meld, the cabbage softens just slightly while maintaining its crunch, and the whole dish comes together in perfect harmony.
Step 4: Serve and Enjoy!
When you’re ready to serve your homemade coleslaw, give it a quick toss to redistribute the dressing. I like to taste it one more time and add a final sprinkle of salt and pepper if needed.
This Classic Coleslaw recipe makes enough to serve 6 as a side dish, but I often double it for gatherings since it disappears quickly! It pairs beautifully with anything barbecued, fried, or grilled—think pulled pork sandwiches, fried chicken, burgers, or grilled sausages. It’s also wonderful alongside seafood dishes like crab cakes or fish tacos.
My Favorite Cooking Tips for Perfect Coleslaw
After years of making this Classic Coleslaw for family gatherings, I’ve collected a few tricks that make a world of difference:
The Cold Bowl Trick
Here’s something my grandmother taught me: chill your mixing bowl in the freezer for 15 minutes before making your coleslaw. This keeps everything crisp from the start. Sounds fussy, but trust me—it’s worth those extra few minutes!
The “Wait, Don’t Dress Yet!” Rule
If you’re preparing your coleslaw way ahead of time, keep the vegetables and dressing separate until about an hour before serving. This prevents that sad, watery situation that happens when cabbage sits in dressing too long. Your future self will thank you!
The Secret Ingredient: Time
I know, I know—in a world of instant everything, suggesting you need to wait sounds almost rebellious. But giving your coleslaw at least an hour to rest in the refrigerator isn’t just a nice idea—it’s essential for flavor development. If your coleslaw tastes a little flat right after mixing, don’t panic! That magic hour transforms it completely.
When Things Go Wrong…
Got a coleslaw emergency? I’ve been there! If your dressing breaks or looks curdled, a quick whisk with a teaspoon of hot water usually fixes it. If your coleslaw turns out too sweet, a splash of extra vinegar or a squeeze of lemon juice brings balance. Too tangy? A pinch of sugar works wonders. Remember, cooking is just delicious problem-solving!
The Coleslaw That Converted My Salad-Hating Family
I have to share a little story about this Classic Coleslaw recipe. My brother-in-law Mike has proudly declared himself “anti-vegetable” for most of his adult life. At family barbecues, he’d pile his plate with meat and potatoes, carefully avoiding anything green.
Last summer, I made this coleslaw for our annual Fourth of July gathering. Maybe it was the heat, maybe it was peer pressure, but Mike reluctantly took a small spoonful alongside his burger. I watched from across the yard as he took a hesitant bite… then immediately went back for seconds. By the end of the day, he had eaten three servings and was asking for the recipe!
Now he requests “that awesome cabbage stuff” at every family get-together. If that’s not a testament to how good this Classic Coleslaw is, I don’t know what is! There’s something deeply satisfying about creating a dish so delicious it can convert even the most committed vegetable skeptics.
Your Coleslaw Questions Answered
Can I make this coleslaw ahead of time?
Absolutely! In fact, this homemade coleslaw actually improves with a little time in the refrigerator. You can make it up to 24 hours in advance, though the optimal window is 2-3 hours before serving. If you need to prepare further ahead, I recommend keeping the vegetables and dressing separate, combining them about an hour before serving time. This ensures your cabbage salad stays fresh and crisp rather than becoming soggy.
How long does coleslaw last in the refrigerator?
When stored in an airtight container, this Classic Coleslaw will stay good for 3-4 days in the refrigerator. You may notice the vegetables release some liquid over time—simply drain this off and give everything a good stir before serving. The flavor actually deepens over the first day or two, making leftover coleslaw a real treat! Just remember that the texture will gradually soften, so it’s best enjoyed within the first 2-3 days for that perfect crunch.
Can I make this coleslaw healthier?
Definitely! This BBQ side dish is easily adaptable to fit different dietary needs. For a lighter version, substitute half (or all) of the mayonnaise with Greek yogurt—you’ll get a tangier flavor profile plus a protein boost. You can reduce or omit the sugar, or swap it for honey or maple syrup. Adding extra vegetables like bell peppers, broccoli stems, or jicama increases the nutritional value while adding interesting textures and flavors. The beauty of this recipe is its flexibility!
More Ways to Enjoy Your Classic Coleslaw
While this creamy coleslaw shines as a side dish, don’t stop there! Here are some creative ways to use it:
As a sandwich topper: Pile it on pulled pork, BBQ chicken, or grilled portobello mushroom sandwiches for a crisp contrast to the rich filling.
In fish tacos: Replace lettuce with coleslaw for an instant flavor upgrade. The tangy crunch perfectly complements the delicate fish.
Alongside fried foods: The acidity cuts through richness, making it perfect with fried chicken, fish and chips, or potato latkes.
In grain bowls: Add a scoop to your quinoa or rice bowl for an instant texture and flavor boost.
What makes this Classic Coleslaw so special is how it elevates everything around it. It’s the supporting actor that sometimes steals the show, the side dish that people remember long after the main course is forgotten.
Simple Additions to Change Things Up
While I love this Classic Coleslaw recipe exactly as written, sometimes it’s fun to play with variations:
Fruity Twist: Add a diced apple or a handful of dried cranberries for sweetness and texture.
Nutty Crunch: Toasted sunflower seeds or slivered almonds add wonderful dimension.
Herb Garden: Fresh herbs like dill, parsley, or cilantro bring bright, fresh notes.
Spicy Kick: A minced jalapeño or dash of hot sauce transforms this into a zesty accompaniment for tacos.
The foundation remains the same, but these small tweaks let you customize your coleslaw to complement whatever else you’re serving. It’s like having multiple recipes in one!
Perfect Pairings for Your Summer Menu
This Classic Coleslaw recipe is the versatile side dish your summer menu needs. It’s particularly wonderful alongside:
Juicy Smoked Brisket – The cool, crisp coleslaw provides the perfect contrast to rich, smoky meat.
Classic Southern Fried Chicken – There’s a reason this pairing is legendary; the tangy slaw cuts through the richness of fried foods.
Easy Pulled Pork Sandwiches – Layer coleslaw right on top of pulled pork for the ultimate sandwich experience.
For extra reading about the magic of balancing flavors in your meals, check out Harvard School of Public Health’s guide to healthy eating. They explain why pairing foods like cabbage with protein-rich dishes creates more satisfying, nutritionally complete meals.
A Simple Dish with Endless Possibilities
As we wrap up this culinary journey through the world of Classic Coleslaw, I hope you’re feeling inspired to whip up a batch for your next meal. There’s something deeply satisfying about transforming humble ingredients like cabbage and carrots into a dish that makes people’s eyes light up.
What I love most about this recipe is how it connects us—to traditions, to seasons, to gatherings around the table. This Classic Coleslaw might seem simple (and it is!), but it’s also the kind of dish that creates memories. It’s the cool, creamy side that completes your summer barbecue, the refreshing contrast to your Sunday roast chicken, the unexpected star of your weekday lunch.
So the next time you spot a head of cabbage in the produce section, I hope you’ll remember this recipe. With just a few minutes of chopping and stirring, you’ll create something truly special—a homemade side dish that proves sometimes the simplest foods are the most satisfying.
Until next time, happy cooking!


