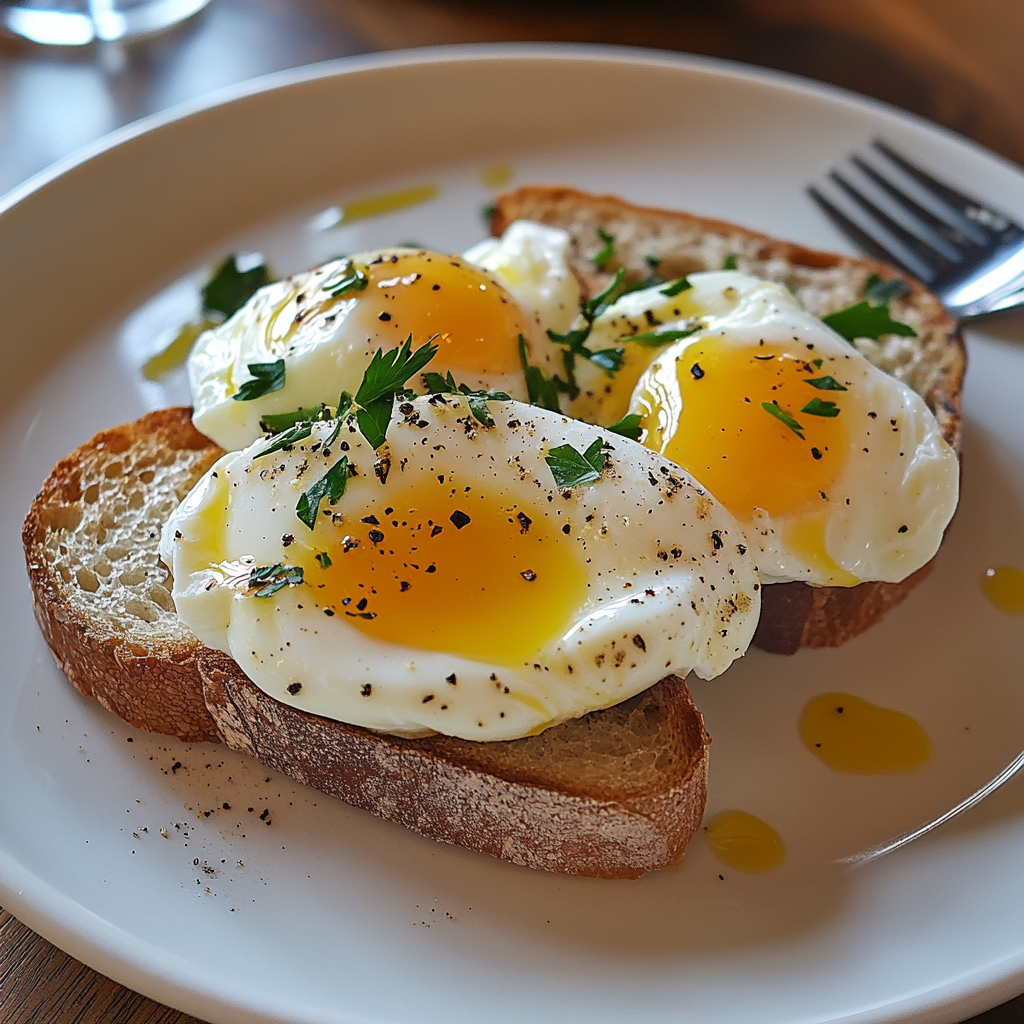
Have you ever ordered poached eggs at a restaurant and wondered how they achieve that beautiful, silky texture with the perfectly runny yolk? As someone who once struggled with eggs that looked more like underwater ghosts than the elegant brunch staple, I’m here to tell you that perfect poached eggs are absolutely within your reach—even on your busiest mornings!
There’s something magical about cutting into a well-made poached egg and watching that golden yolk cascade onto your plate. It’s one of those simple pleasures that can transform an ordinary breakfast into something that feels a little special, a little luxurious—without any fancy equipment or hard-to-find ingredients.
Why You’ll Love These Perfect Poached Eggs
If you’ve been intimidated by poached eggs in the past, I completely understand. They have a reputation for being finicky and difficult to master. But here’s the truth: with the right technique (which I’m about to share), you can create restaurant-quality poached eggs right in your own kitchen.
What makes poached eggs so special? Unlike their fried or scrambled cousins, poached eggs use no added fat in the cooking process, making them a healthier option while preserving all that wonderful egg flavor. The gentle cooking method creates a delicate white that cradles a warm, runny yolk—perfect for topping avocado toast, grain bowls, or simply enjoying on their own with a sprinkle of salt.
Even better? Once you master this technique, you’ll have an impressive culinary skill in your back pocket that takes just minutes to execute. It’s the perfect way to elevate weekend brunches with friends or treat yourself to a special breakfast on a random Tuesday. Who says little luxuries should be saved for special occasions?
What You Need for Perfect Poached Eggs
The beauty of poached eggs lies in their simplicity. You don’t need fancy equipment or a culinary degree—just a few basic ingredients and tools you likely already have in your kitchen:
Ingredients:
- 2 fresh eggs (freshness really matters here—more on that in a minute!)
- Water (enough to fill a medium saucepan about 2/3 full)
- 1 tablespoon white vinegar (optional, but helpful for beginners)
- Salt and pepper to taste
Optional flavor enhancers:
- Fresh herbs like chives, dill, or parsley
- A sprinkle of good cheese (Parmesan, feta, or whatever makes you happy)
- A pinch of paprika or red pepper flakes for a little heat
Equipment:
- Medium saucepan
- Slotted spoon
- Small bowl or ramekin
- Paper towels
The freshness of your eggs really does make a difference when it comes to poaching. Fresh eggs have firmer whites that hold together better during the poaching process. If you’re unsure about the freshness of your eggs, here’s a quick test: fill a glass with water and gently place an egg in it. Fresh eggs will sink and rest horizontally on the bottom. Older eggs will stand upright or float—they’ll still be perfectly fine for other cooking methods, but may not give you that picture-perfect poached egg.
The Step-by-Step Guide to Poaching Eggs
Now that we’ve gathered our ingredients, let’s break down the process into manageable steps. I promise, once you do this a couple of times, it will become second nature!
Step 1: Prepare Your Water Bath
Fill your medium saucepan about two-thirds full with water. Place it over medium heat and bring it to a gentle simmer. What’s a gentle simmer? You’re looking for small bubbles forming at the bottom of the pan, but not a rolling boil. The water should look alive but calm—think quietly murmuring rather than loudly chattering.
If you’re using vinegar (which I recommend for beginners), add a tablespoon to the water now. The vinegar helps the egg whites coagulate more quickly, which means they’re less likely to spread out in ghostly tendrils throughout your pot. Don’t worry—you won’t taste it in the finished egg.
Step 2: Prep Your Egg
While your water is heating, crack one egg into a small bowl or ramekin. This step might seem unnecessary, but it makes a world of difference! It allows you to check for shell fragments and ensures you can gently slide the egg into the water rather than dropping it from a height (which can cause the white to spread).
Pro tip: If you want to get really fancy, you can strain your egg through a fine-mesh sieve to remove the looser part of the white. This creates an extra-neat poached egg, but it’s completely optional.
Step 3: Create the Perfect Poaching Environment
Once your water has reached that gentle simmer, it’s time for a bit of kitchen physics. Use a spoon to create a gentle whirlpool in the water by stirring in a circular motion. This swirling helps the egg white wrap around the yolk as it cooks, giving you that classic, compact poached egg shape.
Step 4: Add Your Egg
Working quickly but gently, position your bowl close to the water’s surface and carefully slide the egg into the center of the whirlpool. The egg will naturally drop to the bottom of the pan and then rise back up as it begins to cook.
Don’t panic if some white spreads out—this is perfectly normal, especially as you’re learning. Focus on keeping the water at that gentle simmer, not a boil, which could break apart your egg.
Step 5: Set Your Timer
For a poached egg with a firm white and a luxuriously runny yolk, you’ll want to cook it for about 3 minutes. If you prefer a firmer yolk, let it go for another minute or so. The cooking time can vary slightly depending on the size of your eggs and how cold they were when they went into the water, so feel free to adjust based on your preferences.
While the egg cooks, resist the urge to poke or prod it too much. Let the gentle heat of the water do its work.
Step 6: The Gentle Extraction
Once your egg has cooked to perfection, it’s time for the extraction. Using a slotted spoon, carefully lift the egg out of the water. Hold it over the pan for a moment to let excess water drain away.
For extra insurance against a watery serving, you can place the egg on a paper towel for a brief moment to absorb any remaining moisture. This step is especially helpful if you’re serving the egg on toast, where excess water could make things soggy.
Step 7: Season and Serve
Season your beautiful creation with a sprinkle of salt and freshly ground pepper, and serve immediately. Poached eggs wait for no one—they’re at their absolute best when served right away!
If you’re making multiple eggs, you can keep the first ones warm by placing them in a bowl of warm (not hot) water while you finish the batch. Just make sure to dry them gently with a paper towel before serving.
Troubleshooting Your Poached Eggs
Even the most experienced cooks sometimes end up with less-than-perfect poached eggs. Here are some common issues and how to fix them:
Problem: The egg whites spread out too much Solution: Make sure you’re using fresh eggs, add a splash of vinegar to the water, and try creating a more vigorous whirlpool before adding the egg.
Problem: The yolk broke during cooking Solution: Be extra gentle when sliding the egg into the water, and make sure the water isn’t boiling too vigorously.
Problem: The whites are cooked but the yolk is still too runny Solution: Keep the egg in the water for another 30-60 seconds. Remember that the egg will continue cooking slightly after you remove it from the water.
Problem: The outside is cooked but there’s still uncooked white around the yolk Solution: The water temperature might be too high. Aim for a gentle simmer rather than a rolling boil.
Serving Suggestions That Elevate Your Poached Eggs
Now that you’ve mastered the art of poaching eggs, let’s talk about all the delicious ways you can enjoy them! A perfectly poached egg is incredibly versatile and can transform even the simplest ingredients into something special.
Classic Pairings for Poached Eggs
The beauty of poached eggs is how they can dress up almost anything. Here are some of my favorite ways to serve them:
Avocado Toast with Poached Eggs: Mash ripe avocado on toasted sourdough, add your poached egg on top, and finish with a sprinkle of red pepper flakes and flaky sea salt. The creamy avocado with the runny yolk creates a sauce that’s simply heavenly.
Simple Poached Eggs on Toast: Sometimes the classics are classics for a reason! Buttered toast topped with a well-seasoned poached egg lets the egg’s silky texture shine. Add a few fresh herbs if you’re feeling fancy.
Grain Bowls: Add a poached egg to a bowl of quinoa or farro with roasted vegetables for a protein boost that creates an instant sauce when you break into that beautiful yolk.
Poached Eggs and Greens: Wilt some spinach or kale with a bit of garlic, top with your poached egg, and finish with a drizzle of good olive oil. It’s a nutrient-packed meal that comes together in minutes.
The Classic Eggs Benedict: If you’re feeling ambitious, there’s nothing quite like a homemade Eggs Benedict with Canadian bacon, English muffins, poached eggs, and hollandaise sauce. It’s the ultimate weekend treat!
Kitchen Wisdom: Tips for Poached Egg Success
After years of poaching eggs (with plenty of failures along the way!), I’ve picked up some tricks that make the process nearly foolproof. Let me share a few that might save you some kitchen frustration:
The Vinegar Debate: Some chefs swear by adding vinegar to the poaching water, while others insist it’s unnecessary. My take? If you’re new to poaching eggs, the vinegar really does help the whites set more quickly. Once you gain confidence, feel free to skip it if you prefer.
The Fresh Egg Test: If your eggs are creating a wispy mess in the water, they might not be fresh enough. Try the water glass test I mentioned earlier, or simply crack your next egg into a small bowl first to check its consistency before poaching.
Batch Cooking: When making poached eggs for a crowd, you can poach them up to a day ahead! Simply undercook them slightly (about 2 minutes instead of 3), then transfer to a bowl of ice water to stop the cooking. When you’re ready to serve, reheat them in hot (not boiling) water for about 30 seconds.
The Muffin Tin Method: If you’re really struggling with the traditional poaching method, try lining a muffin tin cup with plastic wrap, cracking an egg into it, gathering the edges, and twisting to create a little pouch. Then poach these pouches in gently simmering water. The eggs come out perfectly round every time! (Though purists might argue this is technically more like coddling than poaching.)
Got lumpy whites? Don’t sweat it! Even if your poached egg isn’t picture-perfect, it will still taste delicious. I’ve served many “rustic-looking” poached eggs over the years, and nobody has ever complained once they taste that runny yolk goodness!
A Little Story from My Kitchen
I still remember the first time I tried to make poached eggs. It was a Sunday morning, and I wanted to surprise my wife with a special breakfast—Eggs Florentine, which she’d ordered the previous weekend at our favorite brunch spot. How hard could it be?
Let’s just say that my first attempt looked like I’d dropped a bomb in the pot. The whites scattered everywhere, the yolks broke, and I ended up with what can only be described as egg drop soup. Not quite the romantic breakfast I had planned!
But I’m stubborn in the kitchen. After watching countless videos and ruining at least a dozen eggs, I finally got it right. The look on my wife’s face when I served her those perfectly poached eggs was worth all the failed attempts. Now, poached eggs are a weekend tradition in our home, and even my kids request them regularly—though they prefer theirs with buttered “soldiers” (toast strips) for dipping into that golden yolk.
The moral of the story? Don’t give up if your first few poached eggs aren’t perfect. Each attempt gets you closer to mastery, and the skills you develop will serve you for a lifetime of delicious breakfasts.
Frequently Asked Questions About Poaching Eggs
Can I poach multiple eggs at once?
Yes, you can! Once you’re comfortable with the egg poaching process, you can cook several at a time. The key is giving them enough space in the pan. Instead of the whirlpool method, gently slide each egg into a different section of the pan. You might want to add a little extra vinegar to help the whites set quickly. Keep track of which egg went in first so you can remove them in the same order.
How do I know when my poached egg is perfectly cooked?
For that perfect runny yolk, 3 minutes is usually the sweet spot when poaching eggs. However, the best way to check is to gently lift the egg with a slotted spoon and give it a slight jiggle. The whites should be set and opaque, while the yolk should still have some bounce to it. If you’re unsure, you can also gently touch the yolk with your finger—it should feel warm but still soft.
Can I make poached eggs ahead of time?
Absolutely! This is a great trick for entertaining. Poach your eggs for about 30 seconds less than you normally would, then transfer them to a bowl of ice water to stop the cooking process. They can be stored in the refrigerator for up to 24 hours. When you’re ready to serve, simply place them in hot (not boiling) water for about 30 seconds to warm through.
Beyond Breakfast: Poached Eggs Throughout the Day
While we often think of poached eggs as breakfast food, they’re actually perfect any time of day. Here are some ideas for incorporating poached eggs into your lunch and dinner routines:
Lunchtime Salads: A poached egg turns a simple green salad into a substantial meal. The yolk creates a rich dressing when mixed with a light vinaigrette.
Cozy Soups: Float a poached egg on top of ramen, minestrone, or a simple broth for added richness and protein.
Pizza Topper: Add a poached egg to the center of a pizza right after it comes out of the oven for an extra special treat.
Savory Oatmeal: Steel-cut oats cooked with a bit of chicken broth and topped with a poached egg and some sautéed greens make for a hearty, nutritious meal any time of day.
Pasta Enhancer: A poached egg on top of carbonara or a simple olive oil and garlic pasta creates an extra silky sauce when the yolk is broken and stirred in.
The Wonderful World of Poached Eggs Awaits
Mastering the perfect poached egg is like having a culinary secret weapon in your arsenal. Once you’ve got the technique down, you’ll find yourself looking for excuses to add these silky delights to all sorts of dishes. There’s something deeply satisfying about cutting into that tender white and watching the golden yolk create an instant sauce for whatever lies beneath.
Whether you’re making a quick breakfast for yourself, preparing a special brunch for loved ones, or looking to add some protein to your dinner, poached eggs are a versatile, nutritious, and impressive addition to your meal. And the best part? They require nothing more than an egg, some water, and a few minutes of your time.
So the next time you’re standing in your kitchen wondering how to elevate a simple piece of toast or a bowl of greens, remember this guide to perfect poached eggs. I promise you’ll be amazed at how such a simple technique can transform an ordinary meal into something extraordinary.
If you’re looking for more breakfast inspiration, check out our Fluffy Pancakes From Scratch recipe or How to Make The Perfect French Toast for more morning delights.
For those interested in learning more about egg nutrition and cooking methods, the American Egg Board offers excellent resources on getting the most from this versatile protein.
Remember, cooking is about joy and exploration, not perfection. So don’t be afraid to experiment with your poached eggs—add different herbs, try various serving suggestions, and most importantly, have fun in the kitchen!
Happy poaching, friends!


