Why You’ll Love These Strawberry Banana Breakfast Oat Bars
Picture this: It’s 7:30 AM on a Tuesday, your little one needs to be dropped off at school in 20 minutes, your coffee is still too hot to gulp down, and breakfast? Well, that’s the million-dollar question hanging in the air. We’ve all been there – that morning scramble that makes you wish you had an extra set of hands (and maybe an extra hour of sleep!). That’s exactly why these strawberry banana breakfast oat bars have become my family’s morning lifesaver, and I’m betting they’ll become yours too.
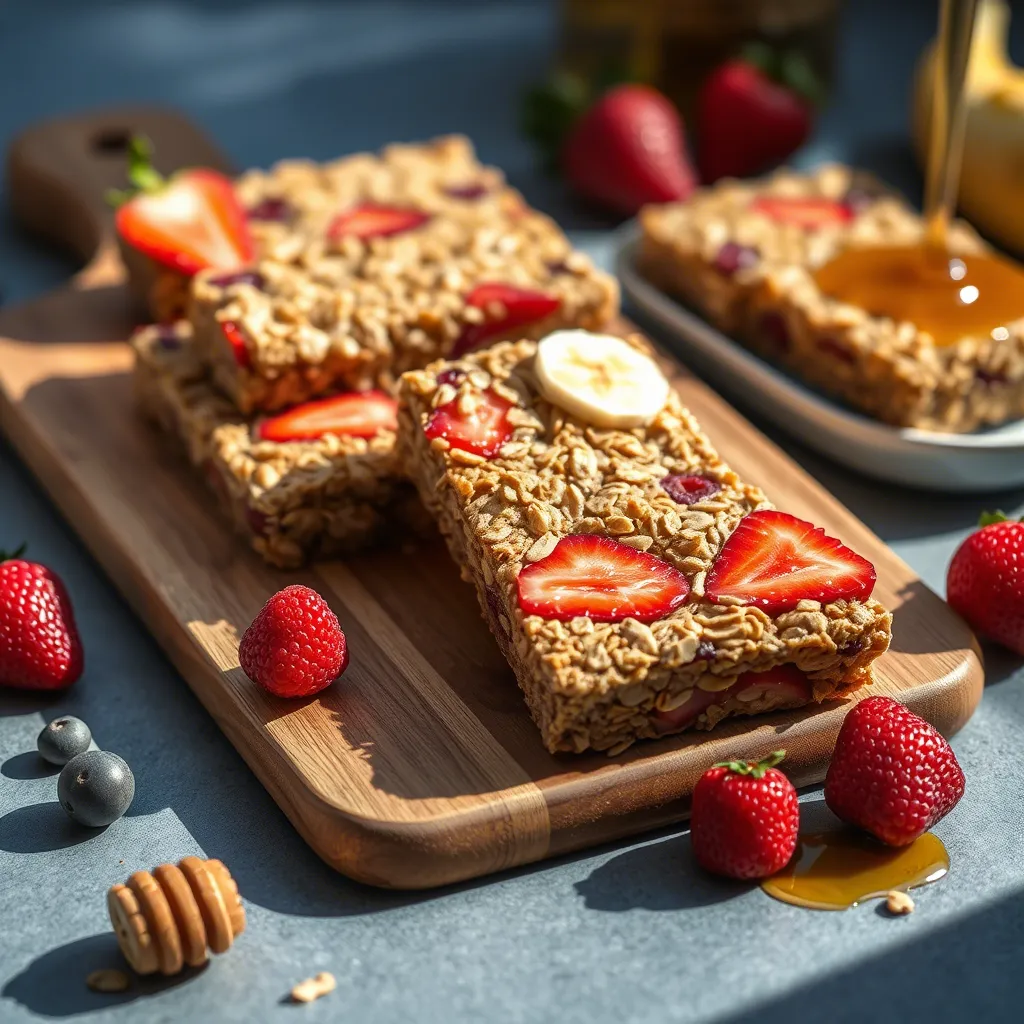
These breakfast oat bars are what I like to call “morning magic” – they combine the wholesome goodness of oats with the natural sweetness of strawberries and bananas to create a portable, nutritious breakfast that feels more like a treat than a health food. And let’s be honest, anything that can make a hectic weekday morning feel a little more manageable is worth its weight in gold, right?
What makes these bars truly special is their versatility. Too busy for a sit-down breakfast? Grab a bar as you head out the door. Need a reliable lunchbox addition that won’t leave your kiddo trading for potato chips? These bars have your back. Looking for a post-workout snack that satisfies without undoing all your hard work? You guessed it – these strawberry banana breakfast oat bars are your new best friend.
As a mom who’s always juggling a million things (aren’t we all?), I’ve become somewhat of an expert at creating recipes that multi-task as well as I do. These bars store beautifully in the fridge for up to a week, or you can freeze them for those “I forgot we had soccer practice today” kind of mornings. They’re also endlessly customizable – don’t have strawberries? Blueberries or raspberries work just as wonderfully. Banana not your thing? Applesauce steps in perfectly.
What I love most about these breakfast bars is how they bridge the gap between nutrition and convenience. The oats provide slow-releasing energy that keeps you going until lunch, while the fruit adds natural sweetness that makes these feel like a treat. Plus, they’re easily adaptable to different dietary needs – whether you’re gluten-free, dairy-free, or trying to reduce refined sugar, these bars can be tweaked to fit right in with your lifestyle.
And let’s talk about the winning combination of strawberry and banana – is there a more classic, beloved fruit duo? The sweetness of ripe bananas complements the slight tartness of strawberries in a way that’s simply irresistible. If you’re a fan of those incredible zucchini brownies I shared last month, you’ll appreciate how these bars similarly sneak in nutrition while still feeling like a treat.
The Story Behind These Strawberry Banana Breakfast Oat Bars
The creation of these strawberry banana breakfast oat bars wasn’t some grand culinary experiment – it was born out of pure, unadulterated morning desperation. Three years ago, when my youngest started kindergarten, our already busy morning routine reached new levels of chaos. Between making lunches, finding missing shoes (how do they always disappear overnight?), and trying to get everyone out the door with their teeth brushed and hair somewhat tamed, breakfast had become an afterthought.
I’d watch my children grabbing whatever was quickest – usually something pre-packaged that made me wince at both the cost and the ingredient list. One particularly frantic Wednesday, after realizing we’d run out of the kids’ favorite cereal, I faced the dreaded breakfast meltdown. You know the one – where a simple “we’re out of Honey Crunch O’s” somehow translates to “the world is ending” in kid-speak.
In a moment of what I can only describe as kitchen improvisation fueled by panic, I threw together oats, some overripe bananas threatening to attract fruit flies on the counter, and the last of the strawberries from our weekend farmers’ market haul. The result wasn’t pretty – more of a lumpy oatmeal bake than the neat bars we have today – but my kids devoured it. The real miracle? They asked for it again the next day.
Over the next few months, I refined the recipe, experimenting with different ratios of ingredients, cooking times, and mix-ins. My kitchen became a test lab, with my family as willing (mostly) guinea pigs. “Too mushy,” my daughter would declare. “Needs more strawberries,” my son would suggest. My husband, bless him, would eat anything I put in front of him with an enthusiastic “It’s great, honey!” (Though I noticed he’d sneak in some extra honey when he thought I wasn’t looking.)
The breakthrough came when my neighbor, a nutritionist with three teenagers of her own, suggested adding ground flaxseed for binding and nutrition. “It’s practically invisible,” she promised, “but packs a serious nutritional punch.” She was right – not only did it help the bars hold together better, but it added a boost of omega-3s that made me feel even better about serving these for breakfast.
Now these bars have become something of a legend in our neighborhood. I bring them to PTA meetings, sports events, and playdates. I’ve received texts at 10 PM from fellow parents desperately asking for the recipe because their child “won’t eat breakfast unless it’s those strawberry banana things that Mrs. Alexandre makes.” Talk about a mom win!
What touches me most is how these simple bars have created a ripple effect of calmer mornings for so many families. A mom in my son’s class recently told me that making these bars has become a Sunday evening ritual with her daughter – their special time to connect and prepare for the week ahead. Another friend reported that her previously breakfast-resistant teenager now grabs two bars every morning before heading to school.
These stories warm my heart because they remind me that cooking isn’t just about nourishing bodies – it’s about creating connections and making life a little easier and more joyful for the people we love. And if a humble oat bar can do all that? Well, that’s a recipe worth sharing.
Ingredients
Let’s talk about what goes into these magical breakfast bars. The beauty of this recipe lies in its simplicity – mostly pantry staples that you likely already have on hand. And if you don’t? No stress! I’ve included substitutions that work just as beautifully.
For the Oat Base:
- 3 cups old-fashioned rolled oats (not quick oats)
- 1 cup whole wheat flour (or all-purpose flour if that’s what you have)
- 1/3 cup ground flaxseed
- 1/2 cup coconut sugar (or brown sugar)
- 1 teaspoon baking powder
- 1/2 teaspoon baking soda
- 1 teaspoon ground cinnamon
- 1/2 teaspoon salt
- 1/2 cup melted coconut oil (butter works wonderfully too)
- 1/3 cup maple syrup (honey is a great substitute)
- 2 large ripe bananas, mashed (about 1 cup)
- 2 large eggs
- 1 teaspoon vanilla extract
For the Strawberry Filling:
- 2 cups fresh strawberries, diced (frozen works too, just thaw and drain excess liquid)
- 1 tablespoon lemon juice
- 2 tablespoons cornstarch
- 3 tablespoons maple syrup
Optional Add-ins:
- 1/2 cup chopped nuts (walnuts or almonds are my favorites)
- 1/4 cup chia seeds
- 1/2 cup dark chocolate chips (for an extra special treat)
- Zest of one lemon (adds a beautiful brightness)
Now, let’s break these ingredients down a bit, because understanding the “why” behind each component helps you make these bars truly your own.
The old-fashioned rolled oats form the heart and soul of these bars. They provide that satisfying chewiness and hearty texture that keeps you feeling full. Quick oats would make the bars too dense, so stick with the old-fashioned variety if possible. If you’re making these for someone with gluten sensitivity, make sure to use certified gluten-free oats.
Whole wheat flour adds structure and a nutty flavor that complements the oats beautifully. It also sneaks in some extra fiber and nutrients. But here’s a little secret – I’ve made these with all-purpose flour, almond flour, and even a gluten-free blend when baking for friends with dietary restrictions. They all work! The texture changes slightly, but the deliciousness remains.
Ground flaxseed is my little nutritional powerhouse. It’s loaded with omega-3s, fiber, and helps bind the bars together. If you don’t have flaxseed, you can substitute with an equal amount of additional flour, though you’ll miss out on the nutritional boost.
Coconut sugar is my go-to sweetener for these bars because it has a lower glycemic index than regular sugar and a subtle caramel-like flavor. But brown sugar works perfectly well, and I’ve even used maple sugar when I’m feeling fancy.
The cinnamon might seem like a small addition, but it really elevates the flavor profile of these bars. It brings warmth and depth that makes these breakfast bars feel comforting and special. I’ve occasionally added a pinch of nutmeg or cardamom as well for variation.
For the wet ingredients, the mashed bananas aren’t just for flavor – they help keep the bars moist and reduce the amount of added fat needed. The riper your bananas, the sweeter and more flavorful your bars will be. Those spotted, almost-too-far-gone bananas on your counter? They’re perfect for this recipe!
The coconut oil adds richness and helps with the texture. I like using coconut oil because its subtle sweetness works well with the fruit, but melted butter gives a more traditional, homey flavor that’s equally delicious. For a dairy-free version, any neutral vegetable oil will do the trick.
Now, let’s talk about those strawberries. The cornstarch might seem like an odd addition, but it works with the lemon juice to create a jammy consistency that prevents the bars from becoming soggy. If you’re using frozen strawberries, be sure to thaw and drain them first, then add an extra teaspoon of cornstarch to account for the additional moisture.
According to research by the American Heart Association, incorporating fruits like strawberries and bananas into your breakfast can help meet daily recommended fruit servings while providing essential vitamins and antioxidants.
Execution
Alright, now that we’ve got our ingredients lined up like eager soldiers ready for battle, let’s dive into making these delicious strawberry banana breakfast oat bars. Don’t worry – there’s nothing complicated here, just straightforward steps that even my most cooking-averse friends have mastered.
Step 1: Prep Your Battlestation Preheat your oven to 350°F (175°C). This is important – an oven that’s not properly preheated is the culprit behind many baking disappointments. Line a 9×13 inch baking pan with parchment paper, leaving some overhang on the sides. This “parchment sling” will make removing the bars a breeze later on. If you’re like me and sometimes realize you’re out of parchment mid-recipe, a good greasing of the pan with cooking spray or butter works too, but the parchment method is foolproof.
Step 2: Prepare the Strawberry Filling In a medium saucepan, combine your diced strawberries, lemon juice, cornstarch, and maple syrup. Stir these together and place over medium heat. Cook this mixture for about 5-7 minutes, stirring frequently. You’ll notice it start to thicken and become jammy – that’s exactly what you want! When it resembles a thick strawberry compote, remove it from heat and set aside to cool slightly.
Step 3: Mix the Dry Ingredients In a large bowl, whisk together the oats, flour, ground flaxseed, coconut sugar, baking powder, baking soda, cinnamon, and salt. Make sure they’re well combined – I usually whisk for about 30 seconds to get everything evenly distributed. If you’re adding any optional dry ingredients like nuts or chia seeds, now’s the time to toss them in.
Step 4: Combine the Wet Ingredients In another bowl, mash your bananas until they’re smooth. A few small lumps are fine – they just add character to your bars! Add the melted coconut oil, maple syrup, eggs, and vanilla extract. Whisk until everything is well combined and looks somewhat uniform. Don’t worry if the coconut oil starts to solidify a bit when it hits the cold ingredients – it’ll all melt together beautifully in the oven.
Step 5: Bring It All Together Pour your wet ingredient mixture into the bowl with the dry ingredients. Using a spatula or wooden spoon, fold everything together until just combined. The key word here is “just” – overmixing can make your bars tough. The mixture should be thick and sticky. If it seems too dry, add a tablespoon of milk. Too wet? Add a tablespoon or two of flour.
Step 6: Assemble and Bake Press about two-thirds of the oat mixture into your prepared baking pan, creating an even layer. I find using slightly damp hands prevents the mixture from sticking to your fingers. Next, spread your strawberry filling evenly over this base layer. Then, crumble the remaining oat mixture over the top of the strawberry layer. Don’t worry about covering every inch – the peeking bits of strawberry look beautiful after baking!
Step 7: Bake to Perfect Golden Goodness Pop your pan into the preheated oven and bake for 25-30 minutes. You’re looking for the top to be golden brown and fairly firm to the touch. A toothpick inserted into the oat portion should come out clean. If you notice the top browning too quickly but the bars aren’t done, tent some foil over the pan to prevent burning.
Step 8: The Hardest Part – Waiting Once done, remove from the oven and place the pan on a wire rack. Now, here comes the real test of willpower – you need to let these bars cool COMPLETELY before cutting them. I know, I know – the smell is intoxicating and you want to dive right in. But trust me, cooling is crucial for proper setting. I recommend at least an hour at room temperature, or even better, cooling completely and then refrigerating for an hour before cutting for the cleanest lines.
When completely cool, use the parchment paper overhang to lift the entire slab out of the pan, then cut into 12 generous bars. For breakfast portions, 12 works perfectly. If you’re making these for snacks or adding them to amazing lunchbox ideas, you might want to cut them into 16 or even 24 smaller pieces.
Additional Tips
Let’s dive into some game-changing tips that will elevate your strawberry banana breakfast oat bars from delicious to absolutely unforgettable. After making these bars weekly for my family (and receiving countless requests for the recipe), I’ve picked up a few tricks that make all the difference.
Storage Solutions That Keep ‘Em Fresh
First things first – proper storage is key to maintaining the texture and flavor of these breakfast bars. After they’ve cooled completely, store them in an airtight container with parchment paper between layers to prevent sticking. At room temperature, they’ll keep beautifully for 2-3 days, but pop them in the refrigerator and they’ll stay fresh for up to a week.
For busy parents (isn’t that all of us?), these bars are a meal-prepping dream. Make a double batch on Sunday, and you’ve got breakfast covered for the entire week! I like to individually wrap each bar in parchment paper, then place them all in a large zip-top bag in the freezer. They’ll keep for up to three months this way. Just grab one the night before and let it thaw in the refrigerator, or microwave a frozen bar for about 30 seconds if you’re really in a morning rush.
Seasonal Fruit Variations
While strawberry and banana create a classic, kid-approved combination, don’t be afraid to switch things up based on what’s in season or on sale. Here are some of my family’s favorite variations:
- Summer: Replace strawberries with blueberries, blackberries, or peaches
- Fall: Swap in diced apples or pears with a touch of extra cinnamon
- Winter: Use frozen berries or try cranberries with a bit more sweetener
- Spring: Rhubarb (mixed with strawberries) makes a tangy, delightful filling
The basic formula stays the same – about 2 cups of fruit for the filling – but adjusting the sweetness and cornstarch may be necessary depending on how juicy your chosen fruit is.
Make It Your Own: Dietary Adaptations
One of the reasons I love sharing this recipe is how easily it adapts to different dietary needs:
- Gluten-Free: Use certified gluten-free oats and replace the whole wheat flour with a 1:1 gluten-free flour blend. Add an extra 1/4 teaspoon of xanthan gum if your blend doesn’t include it.
- Vegan: Replace eggs with flax eggs (2 tablespoons ground flaxseed mixed with 6 tablespoons water, let sit for 5 minutes until gel-like) and use maple syrup instead of honey.
- Nut-Free: Simply omit any nuts and you’re good to go! The recipe works perfectly without them.
- Lower Sugar: Reduce the coconut sugar to 1/4 cup and use a mashed ripe banana plus 1/4 teaspoon stevia for sweetness in the filling instead of maple syrup.
According to Healthline’s nutrition experts, the oats in these bars provide numerous health benefits including balanced blood sugar and improved heart health, making these adaptations not just convenient but potentially beneficial for various health concerns.
Texture Troubleshooting
If your bars turned out too crumbly, don’t despair! This usually happens when there’s not enough moisture binding everything together. Next time, try adding an extra tablespoon of coconut oil or an additional egg. Another common culprit is overbaking, so watch your oven carefully – all ovens run a bit differently!
On the flip side, if your bars are too soft or didn’t set properly, they likely needed more time in the oven or perhaps your bananas were extra large and added too much moisture. Try reducing the banana slightly or adding a few extra tablespoons of flour to absorb the excess moisture.
Serving Suggestions That Wow
While these bars are absolutely delicious on their own, why not get fancy sometimes? Here are some serving ideas that make these breakfast bars feel extra special:
- Warm a bar slightly and top with a dollop of Greek yogurt and a drizzle of honey
- Crumble a bar over a bowl of vanilla yogurt and fresh fruit for a breakfast parfait
- Pack alongside a small container of nut butter for dipping
- For dessert (yes, they work as dessert too!), warm and top with a small scoop of vanilla ice cream
Make-Ahead Tips for Busy Mornings
Prepare components ahead of time to streamline your baking process:
- Mix all dry ingredients and store in an airtight container for up to a month
- Prepare the strawberry filling and refrigerate for up to 3 days
- Measure and combine wet ingredients (except eggs) the night before, refrigerate, then add eggs and continue with the recipe in the morning
Kid-Friendly Participation
Some of my fondest memories come from making these bars with my children. Here are age-appropriate ways kids can help:
- Toddlers: Mash bananas with a fork (expect mess and maybe some sampling!)
- 4-6 year olds: Help measure and mix dry ingredients
- 7-10 year olds: Dice strawberries with a butter knife and help layer the bars
- Tweens and teens: Can handle pretty much the entire recipe with supervision
Getting kids involved not only creates beautiful memories but also increases the likelihood they’ll actually eat what they’ve helped create – a win-win for parents tired of mealtime battles!
FAQs
Can I use quick oats instead of old-fashioned rolled oats?
While quick oats will technically work, they’ll give your breakfast bars a different texture – usually denser and less chewy. If quick oats are all you have on hand, reduce the amount by about 1/4 cup and expect a slightly different outcome. Old-fashioned rolled oats really do provide the best texture and structure for these strawberry banana breakfast oat bars.
My strawberry filling leaked out during baking. What went wrong?
This usually happens when the filling isn’t thickened enough before assembly or when the base layer isn’t packed firmly enough. Make sure your strawberry mixture resembles a thick jam before spreading it over the base. Also, really press that bottom layer firmly into the pan – I use the bottom of a measuring cup to compact it evenly. If leakage still occurs, try creating a slight “lip” around the edges with the base mixture to contain the filling.
Can I use frozen strawberries when fresh aren’t available?
Absolutely! Frozen strawberries work wonderfully in this recipe, especially during winter months when fresh berries might break the bank. Just thaw them completely first, drain any excess liquid (save it for smoothies!), and add an extra teaspoon of cornstarch to account for the additional moisture. The frozen berries might make your filling a bit more intensely colored, which creates a beautiful contrast with the golden oat layers.
How can I make these breakfast bars higher in protein?
These grab-and-go breakfast bars can easily be adapted to pack more protein. Try replacing 1/4 cup of the flour with protein powder (unflavored or vanilla works best), adding 1/4 cup of hemp seeds to the dry ingredients, or incorporating 1/2 cup of chopped nuts. You can also serve them alongside a protein-rich Greek yogurt for a complete breakfast that will keep you satisfied until lunch.
My family doesn’t like bananas. Can I substitute something else?
Yes, you can replace the mashed bananas with 1 cup of unsweetened applesauce or 1 cup of pumpkin puree. Both options work beautifully, though they will change the flavor profile slightly. With applesauce, consider adding a bit more cinnamon and a pinch of nutmeg. With pumpkin puree, embrace the fall flavors by adding pumpkin pie spice to create a variation similar to my popular pumpkin banana loaf.
Can these breakfast bars be made ahead for special occasions like holiday brunches?
These bars are perfect for make-ahead brunches! Prepare them up to three days in advance and refrigerate, or make them a month ahead and freeze. For holiday brunches, I like to dress them up by drizzling the tops with a simple glaze made from powdered sugar and a splash of milk, then adding a sprinkle of finely chopped nuts or a dusting of cinnamon. They look festive and guests always rave about them!
How do I know when the bars are done baking?
The most reliable indicator is the color – you want the top to be golden brown, not pale. The center should feel set when gently pressed with a finger (it will be hot, so be careful!). A toothpick inserted into the oat portion (not the filling) should come out mostly clean with perhaps a few moist crumbs. Remember that the bars will continue to firm up as they cool, so it’s better to slightly underbake than overbake if you want that perfect chewy texture.
Strawberry banana breakfast oat bars have become a staple in my kitchen and the kitchens of countless friends who’ve tried them. They bridge the gap between convenient and nutritious – a rarity in today’s busy world. Whether you’re seeking a quick breakfast solution, a healthy lunchbox addition, or just a satisfying snack, these bars deliver on all fronts.
What I love most about sharing this recipe is knowing it might bring a little morning calm to your household, just as it has to mine. There’s something deeply satisfying about watching someone enjoy food you’ve prepared, especially when it makes their day a little easier and more delicious. So from my kitchen to yours, enjoy these strawberry banana breakfast bars – may they bring you many moments of breakfast bliss amid life’s beautiful chaos!


